Donna’s pickled shrimps

Happy New Year dear followers.

This has been the strangest New Years Eve in many years for us. Usually we spent new years eve with a couple of friends or 10 having a great party with good food, wine, drinks and champagne. We knew already early on that this new years eve would be different as we have moved from one continent to another, but what we hadn’t planned was a night on the couch with blanket all up the our ears and a visit from the good old flu…
Fortunately we hadn’t made any NYE plan when the flu struck Chris a few days after Christmas and then moved on to me a few days later. Another fortunate thing is, that none of us has been really really bad, but just under the weather and not feeling to well.

Flu, cold or what ever struck us wasn’t gonna keep us from having a good dinner and we therefore decided to bake some easy rustic baguettes and make these delicious and very easy pickled shrimps. It is easy to make and it tastes wonderful and can be served as a snack table or as an appetizer. The reason I call it Donna’s pickled shrimps is simply because I got the recipe from Donna who is very good family friend who have helped us a lot since we moved her. They usually make pickled shrimps around Christmas, but I can definitely tell you that this recipe will be used quite often in our house 🙂 So thank you Donna!

Ingredients (8 servings)
2 lb shrimps
1 onion
1 1/4 cup salad oil
3/4 cup vinegar
1 1/2 tsp salt
2 1/2 tsp celery seeds
2 1/2 tbsp capers
Dash of hot sauce

Cook and peel the shrimps. I usually peel the shrimps first and then cook them, but some people find it easier to the other way around. If you want it to be even easier, you can just the cooked and peeled ones in your local supermarket.
I always buy the raw shrimps and cook them for 3-4 minutes in simmering water. Let cool completely.
Add salad oil, vinegar, salt, celery seeds and hot sauce in a large bowl and whisk to combine. Slice the onion into whole or half rings and add to the oil mixture together with capers and cooled shrimps. Mix well, cover the bowl with plastic wrap and let rest in the fridge for 24 hours. Drain the pickled shrimps just before serving.

Serve with freshly baked baguette and a good cooled white wine.
FOOD ON DEMANT (2 of 12)

Bon Appétit friends!

Ingredients (8 servings)
900 g shrimps
1 onion
315 ml salad oil
175 ml vinegar
1 1/2 tsp salt
2 1/2 tsp celery seeds
2 1/2 tbsp capers
Dash of hot sauce

Advertisement

Ebelskiver or Æbelskiver as we call it in Danish

Ebelskiver, or æbelskiver as we say in Danish, is a very popular eating around Christmas. In our family it is tradition to eat ebelskiver in the afternoon on the 4 Sundays before Christmas (advent). Usually my dad bake them in the morning so they are all fresh, mount and crisp at the same time.
However, this year is quite different… My dad is still baking ebelskiver every week in December, but I am not there to eat them any more 😦 As some you know, we moved from Denmark to Atlanta earlier this year to fulfill a dream of owning our own business and create a heritage for the next generation of Demant(s). We are still setting up the business and due to our visa status we cannot go home to spent Christmas with our family, but will have to wait until we are ready to apply for the visa that will make us permanent residence. Hopefully we will be ready very soon!

Well, to get back to the ebelskive part, I have bought my own pan now that I am too far away from my parents house. I bought the electric model from William Sonoma as my dad recommended and I am very satisfied with it. It heats equally in all 9 holes and you can adjust the temperature pretty easily.

The ebelskive is a very old tradition in Denmark. The original ebelskive was a slice of apple turned in a pancake batter and fried on a pan. This version is dated back to the stone age. Later on during the renaissance the ebelskive became round, but still contained a piece of apple in the middle. This didn’t changes until the middle ages where the apple piece was removed and the ebelskive as we know it today was born.

My recipe is only one of thousands recipes for ebelskiver. Honestly I think that each family makes them differently. I, for example, makes them different than my dad as he used baking soda and baking powder, while I do the opposite. Other people use milk instead of buttermilk and the Americanized version calls for yeast… So the only rule that applies when you are making ebelskiver is the somehow round shape 🙂


Ingredients (27-30 ebelskiver)
2 cups buttermilk
9 oz. flour
2 tsp baking powder
1/4 tsp salt
1 tbsp sugar
2 eggs
1 tbsp vanilla sugar (or seeds from 1/2 vanilla pod)
Butter for the pan

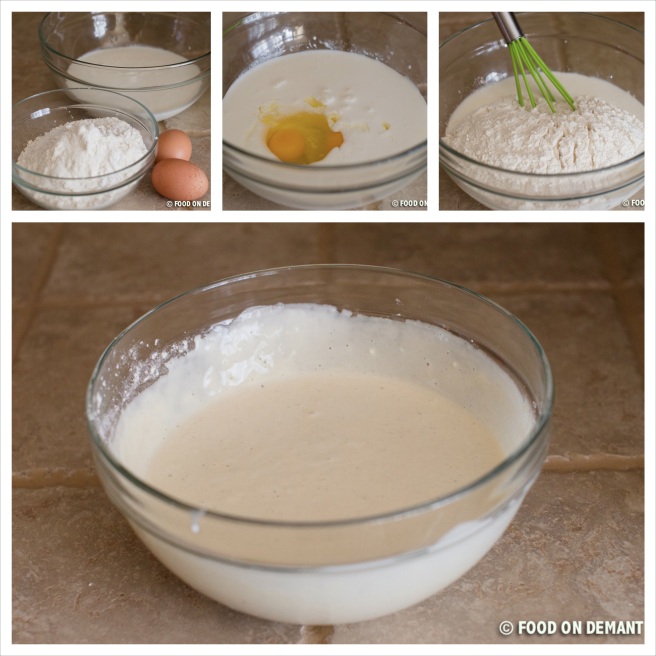
Mix buttermilk and eggs in a large mixing bowl and the remaining ingredients in another bowl. Shift the dry ingredients into the wet and whisk well to combine.Æbleskiver 1
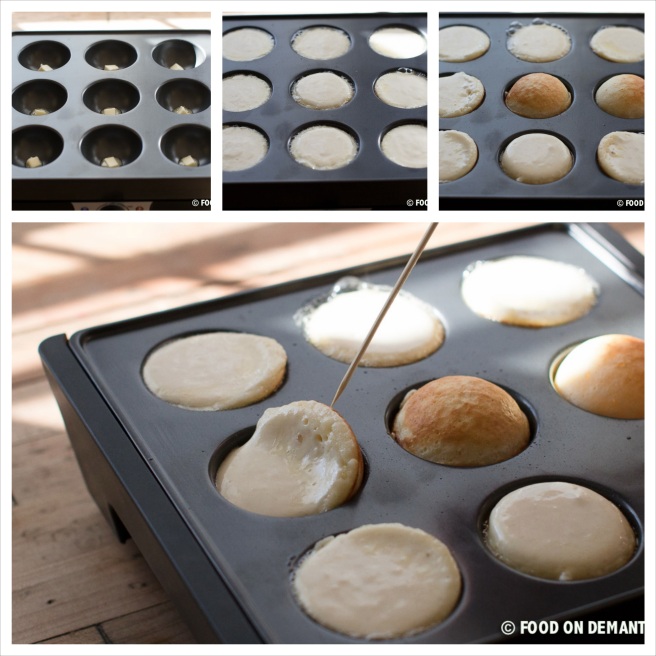
Turn the ebelskive pan on full heat (medium/high if you use the old fashioned cast iron model) and place a small peace of butter in each hole. Add a 1/4 cup of the ebelskive batter to each hole and let bake until the batter is set in the bottom and the sides are firm and brown.
Use a fork or a stick to turn the ebelskiver. Turn each ebelskive 90 degrees and let sit for 45-60 seconds before turning them all the way around. This allows for the batter to set before turning them all around. This method will leave a small opening and a little hole in the middle of each ebelskive. I use it as a spoon to pick up the sugar and jam.
If you would rather like your ebelskiver to be perfect round, you can add a little bit of extra batter when you turn the ebelskive at 90 degrees.

Æbleskiver 2

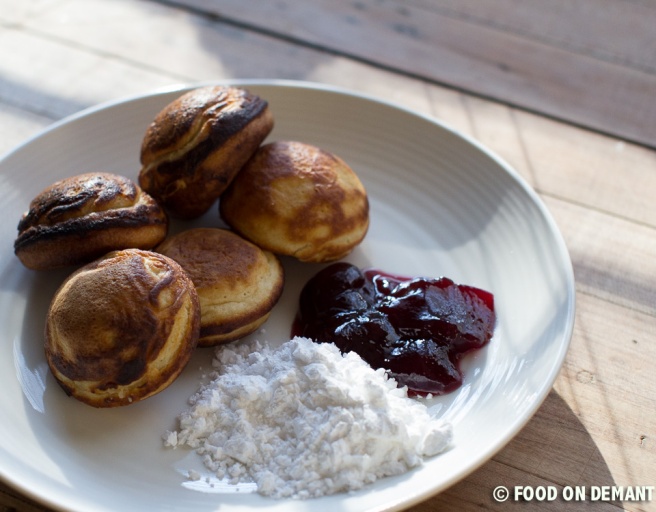
Serve warm with powdered sugar and jam on a cold windy Sunday afternoon. Goes very well with a cup of hot chocolate with marshmallows 🙂Æbleskiver (10 of 10)

Bon Appétit Friends!

Ingredients (27-30 ebelskiver)
1/2 L buttermilk
250 g flour
2 tsp baking powder
1/4 tsp salt
1 tbsp sugar
2 eggs
1 tbsp vanilla sugar (or seeds from 1/2 vanilla pod)
Butter for the pan

Spicy Mayonnaise

Last week I gave you my version of an easy and creamy mayonnaise without any additives. This week I’ll show you how to spice up your mayonnaise in only a few minutes.
You can use any kind of chili for this recipe, but please do you self the favor only adding half the chili, then taste and then add more chili if necessary. You don’t want the chili to dominate the entire mayonnaise, but you still want it to have that spicy bite that makes it burn a little bit on the tongue.

Ingredients (1 cup)
1 cup mayonnaise
1 habanero chilies
1 garlic clove
1 tsp lemon zest
2 tbsp chives

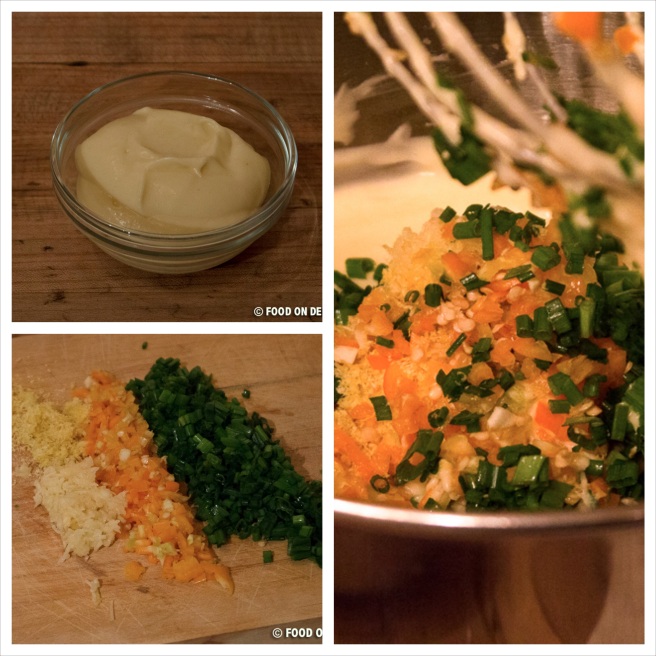
Chop the chili, garlic clove and chives finely. Add half the chili and all the remaining ingredients to the mayonnaise and combine it thoroughly with a whisker or a spatula (I use the wicker on my KitchenAid stand mixer, as I make large portions, but a hand whisker or a spatula is just as good). Taste and add the remaining chili if you want it stronger. However, be aware that it takes a day or two to get to the full strength, so when you taste it at this point, you will not get the full power from the chili.

Spicy Mayonnaise 1

Transfer the mayonnaise to an air tight jar and refrigerate for up to 8 weeks. For the best result, keep refrigerated for 1-2 days before using it. If you don’t have 1-2 days to wait, you can of cause serve it immediately.
Fits perfectly as a condiment in sandwiches, for salty oven roasted potatoes, on top of a perfectly grilled lobster or as I like it best, on a peace of toasted French baguette with a slice of good salumi.Mayonnaise (12 of 12)

Bon Appétit Friends!

Ingredients (250 ml)

250 ml mayonnaise
1 habanero chilies
1 garlic clove, minced
1 tsp lemon zest
2 tbsp chives, chopped

Liquorice Marzipan – my Christmas addiction

Licorice or lakrids as we say in Danish is a favorite of mine when it comes to sweets as well as alternative food spices. I use it regularly when i make my own sweets and as regular candy, my mom sends me a package once in a while, so I can build a stock.
Since I moved to Atlanta in April I haven’t really had any time to play in kitchen, but now that Christmas is around the corner, I have taken a few days out of the calendar to prepare the usual christmas cookies and candy.

I use liquorice products from Johan Bülow, a Danish entrepreneur how with an amazing drive and high quality products, and if you spent $90 or more you get free shipment world wide. However, if you don’t feel like spending that much money for a product you don’t know you can buy some cheaper liquorice powder (can be found in some middle eastern stores or online) and make the liquorice syrup your self (melt some salty liquorice in a little bit of water and wupti, you have made your own syrup).

The marzipan for this recipe is totally similar to a regular marzipan, but with half of the syrup replaced with liquorice in stead of simple syrup. So give it a try, it’s different but so delicious perfect for several Christmas treats 🙂


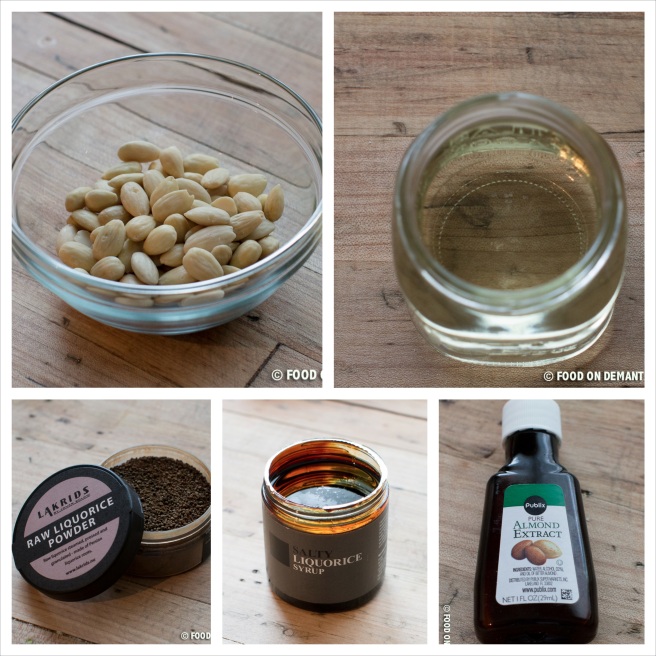
Ingredients (7 oz.)

3.5 oz. almonds, blanched
1 tbsp. simple syrup (find recipe below)
1 tbsp. salty liquorice syrup from Johan Bülow
1 drop almond extract
2 tsp. raw liquorice powder from Johan Bülow

Simple syrup:
9/10 cup sugar
1/3 cup corn syrup
4/10 cup water

Place all the ingredients for the simple syrup in a sauce pan and bring to a boil. Let boil for a few minutes until the sugar is dissolved and the syrup thickens a bit. It is important not to let the syrup reduce to much as it will give you trouble when you are about to make the marzipan. Transfer the hot syrup to a heat- and air tight jar. You will only need 1 tbsp. for this recipe, but you can store the syrup for next time or for other purposes.

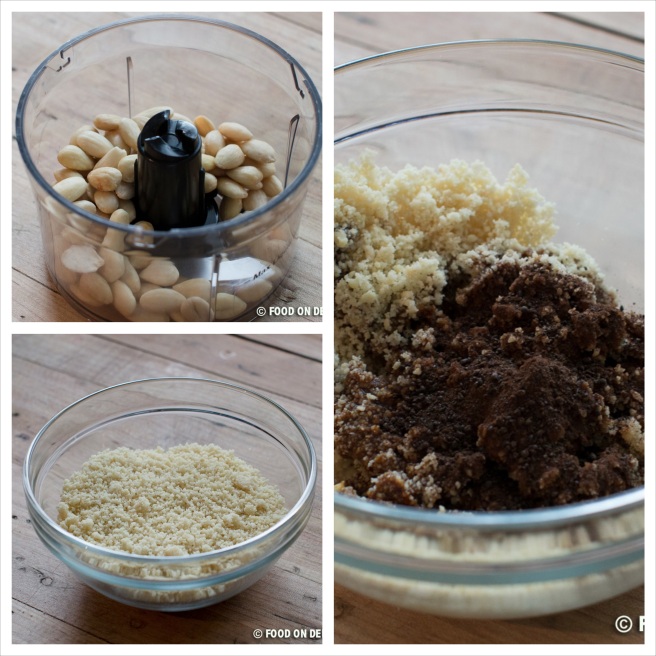
Liquorice Marzipan 1Place the blanched almonds in a blender and blend until it turns into flour. For me it takes 45-60 seconds, but my blender is pretty tired these days. I recommend that you take a look at it after 30 seconds. You can always give it more, not less.
Transfer your almond flour to medium mixing bowl and use a finger to make a hole in the middle.
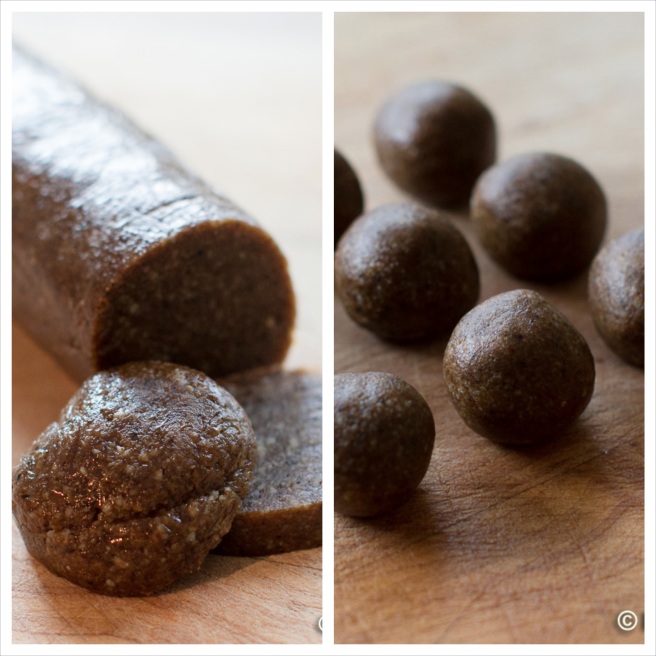
Pour simple syrup, liquorice syrup, almond extract and raw liquorice powder into the hole and use your finders to mix it all together. Keep mixing until it stops being sticky and turns into smooth and uniform mass. Before you know it, you have a perfect and really tasty liquorice marzipan. If you feel that the mixing process takes too long you can transfer the mixture to a blender/food processor and run it high speed for approximately 30 seconds. This solution is only recommended if you have a blender/food processor with a strong motor. Other wise you might end up ruining the machine.

Liquorice Marzipan 2

Wrap the marzipan in cling wrap and refrigerate for 24 hours before using it. This will allow the liquorice taste to be absorbed into the almond flour and create a beautiful sweet and salty flavor.

Liquorice Marzipan 3

Suggested use:
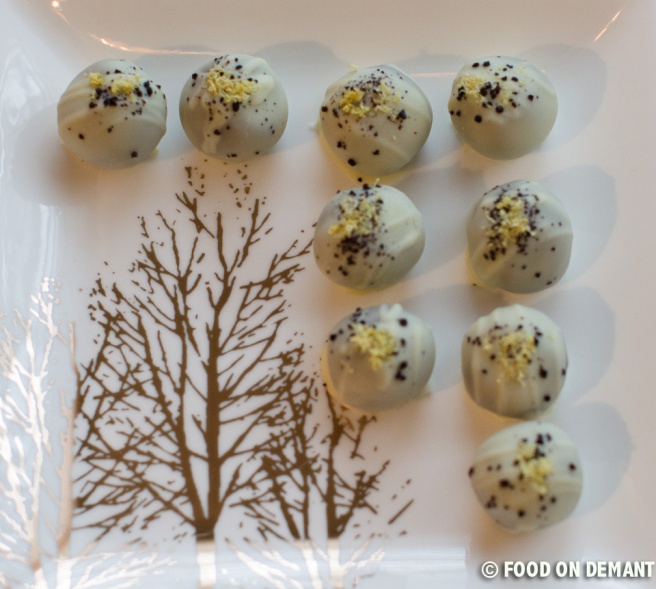
(1) Divide into 18 equally small pieces and roll them into ball. Cover with tempered white chocolate and drizzle with raw licorice powder and lemon zest,
(2) or these alternative liquorice wreaths from Sweet, Sour, Savory.

Liquorice Marzipan (18 of 19)

Bon Appétit friends!

Ingredients (200 g)
100 g almonds, blanched
1 tbsp. simple syrup (find recipe below)
1 tbsp. salty liquorice syrup from Johan Bülow
1 drop almond extract
2 tsp. raw liquorice powder from Johan Bülow

Simple Syrup:
225 g sugar
75 g corn syrup
100 ml water

Mayonnaise – simple, easy, delicious and without additives!

Mayonnaise – who doesn’t use mayonnaise at least once in a while?
Well, we use many almost every day as a sandwich spread, in cold dressings or as a condiment for tapas dishes.

For years I bought my mayo, mostly because I didn’t realize how easy it was to make myself. Then one evening we were having friends over for dinner and to my horror I realized that I didn’t have any mayo for the salad dressing I had planned to make, and I didn’t have time to go the grocery store to buy some. So what to do?? Well, I looked in the fridge and all my cabinets for an alternative and what I found was egg yolks, mustard, vinegar and vegetable oil and there the case was set – I needed to make my first mayo and I was in a hurry! Of cause our guests turned up in the middle of my mayo-miracle and everyone stood there in the kitchen looking at me while I slowly but confidently poured oil into the egg mixture and created my first and very successful mayonnaise.

Ingredients (6 cups)

16 oz egg yolk or egg stir

4 tbsp Dijon mustard

4 tbsp red wine vinegar

48 fl oz vegetable oil

2-4 tsp salt

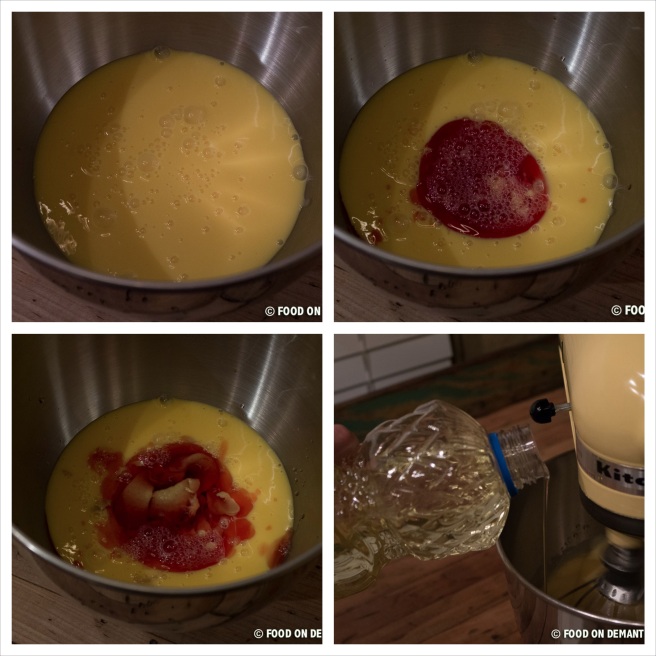
Mix together egg yolk/egg stir, mustard and vinegar in a medium-large bowl, using a stand mixer, hand mixer or a whisker if you feel like getting some overarm/shoulder exercise. Using my KitchenAid I have on speed 6 during the entire process. If you use a regular whisker, try to keep the same whisking speed all the time. If you get tired (which you will, making large portion like this) you can have a break or two, just remember not to leave any excess oil on top of the mayonnaise while you arm is recovering. Incorporate the oil and then take a break.

Mayonnaise 1

Keep on mixing while you slowly pour in the vegetable oil.
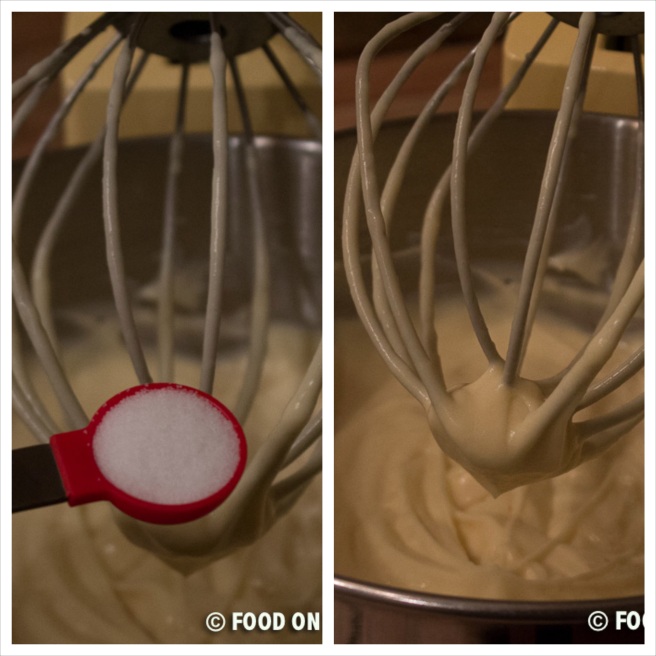
If you get too much oil into the mixture at one time the eggs cannot absorb the oil and you will ruin the mayonnaise. So it is better to take a few more minutes and get the exact right consistency instead of ruining the entire mayonnaise. As you pour in the oil and mix you see the mixture thicken and turn in to a lovely an light mayonnaise. Towards the end of the process you might find it difficult to incorporate the remaining oil. If you feel that the mayonnaise has the right consistency, stop pouring in anymore oil. If you want it a little bit thicker you can take finish off the process with a regular whisker, making sure that you get all the way around the edges of the bowl.
Add 1 tsp. of sat at a time until you have the wanted taste.

Mayonnaise 2

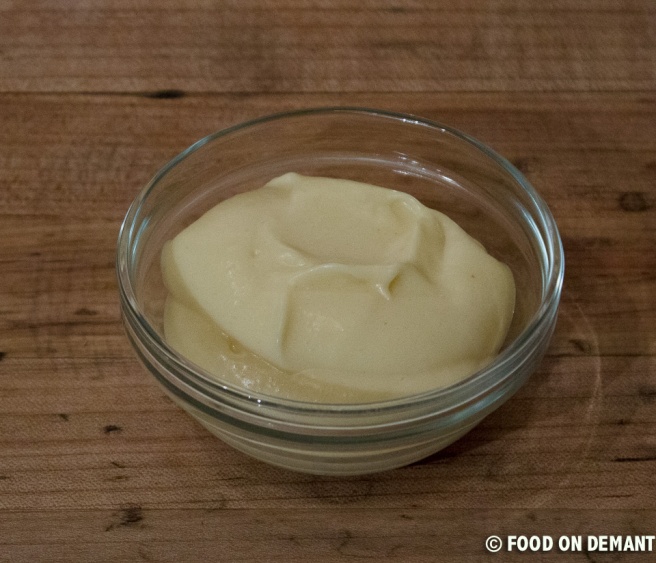
Transfer the mayonnaise to air tight jars (I use Mason jars) and store in the fridge for up to 4 weeks.
Use as a sandwich spread, as dipping for warm freshly baked bread, as a condiment for oven roasted salty potatoes or something fourth and totally different – mayonnaise is perfect for almost everything 🙂

FOOD ON DEMANT (1 of 1)

Bon Appétit friends!

Ingredients (6 cups)

450 g egg yolk or egg stir

4 tbsp Dijon mustard

4 tbsp red wine vinegar

1420 ml vegetable oil

2-4 tsp salt

Ginger and chili kick starter – without a juicer

Are you among those people that believe that you need a nice and expensive juicer to make your own juice? Well, I was once one of those people and as I knew I was moving from one end of the world to another I didn’t wanna go and spend the necessary amount of money on a juicer and was therefore not making any juices.
After a winter with a few colds, a sore throat and a bad craving for home made juice I decided to come up with an alternative. I went to my kitchen, looked in all my cabinets and quickly decided to try the blender, bowl, colander and kitchen towel method and you know what? It worked perfectly… and in that moment I realized that I had probably just saved about $200 (the average price for a good juicer in Denmark) – $200 that I could use on something else and still get a perfect juice whenever I wanted 🙂
Know that I have moved I still use this method as I find it a little stupid to spent money on something that I can do myself and get the same result. Of cause it takes a little longer (15 minutes) but I think it is worth it in the end and you will definitely fell more passionately about your juice when it is made this way 🙂

If you get hooked on the juice-without-a-juicer idea, you can check out my other my other juice recipes which includes carrot and clementine, clementine and orange, cranberry enegizer and the green vitamin bomb.

Ingredients (4 servings)

2 large or 4 medium apples

1 orange

0.5 lemon

1 chili

1 tbsp ginger root

0.5 cup water, cold

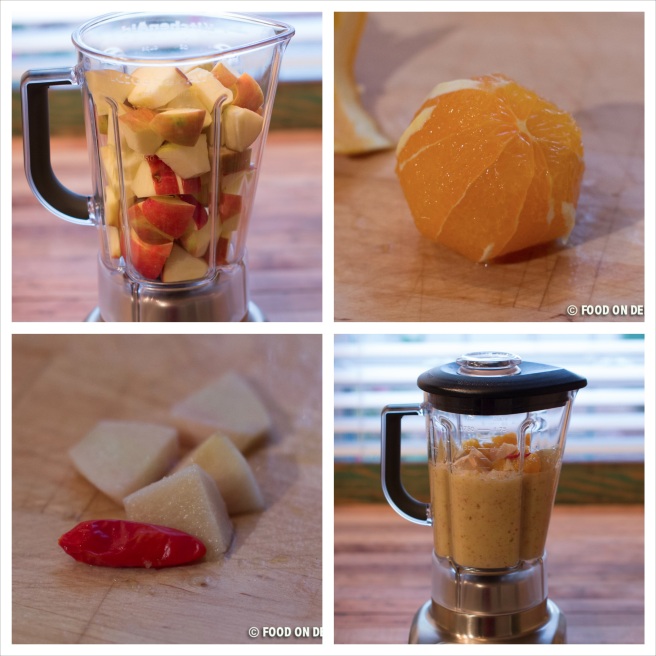
Rinse the apples in cold water, remove the core and chop into smaller pieces. Place in a regular blender together with the cold water. Blend for a few seconds to give space to remaining ingredients (this is not necessary if your blender is big enough to contain it all).
Peel the orange, lemon and ginger, cut it into smaller pieces and add it to the blended apples together with the chili. I have used a Tabasco chili, which gives it a little kick – not too much, not too little, but you can use any chili.
Blend it all well together. I use the ‘liquify’ button on my KitchenAid blender for about 30 seconds.

Ginger & chili juice 1

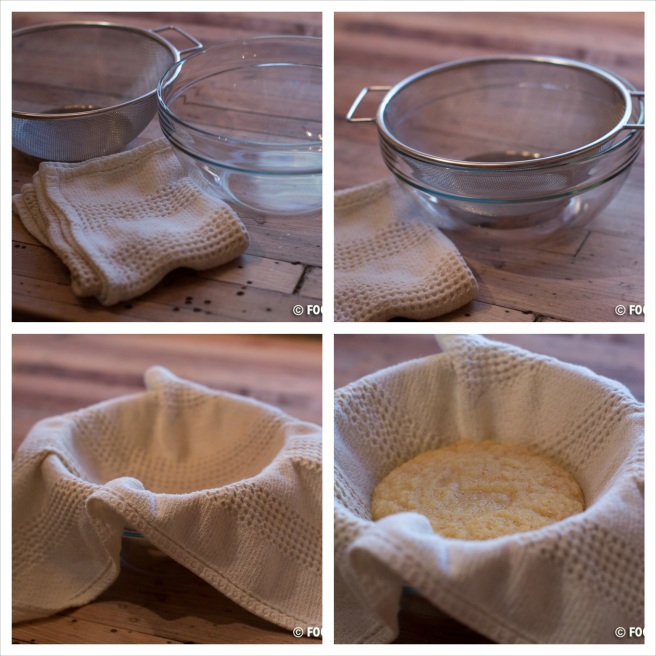
Find a bowl, a colander and a kitchen towel. It is important that it is a brand new kitchen towel that you only use for juicing and nothing else.
Place the colander in the bowl, cover it with the towel and pour approximately half of your juice batter into the towel.Ginger & chili juice 2

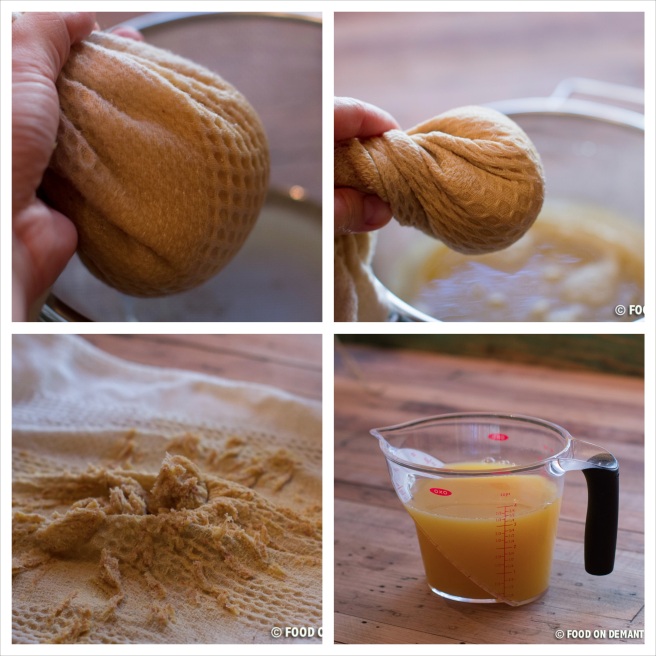
Use one hand to assemble the towel and the other hand to twist it around. Keep twisting to get all the juices out. Remove the all the dry fruit from the towel and repeat the process with the other half of the juice batter.
This portion makes about 3.5 cups (a lille less than 1 liter) and is enough for 4 servings.

Ginger & chili juice 3

Let the juice rest in the fridge for an hour or two if you want a strong ginger taste. Otherwise you can serve immediately in a glass with a few ice cubes.
If you have kids and plan on serving this juice for breakfast, you should consider leaving out the chili and only use half of the ginger.

Serve for breakfast, after a trip to the gym or use it as a natural remedy against a sore throat. This juice can be serves for anything at any time, so there is no excuse for not trying it 🙂

FOOD ON DEMANT (2 of 2)

Bon Appétit Friends!

Ingredients (4 servings)

2 large or 4 medium apples

1 orange

0.5 lemon

1 chili

1 tbsp ginger root

1.25 dl water, cold

Stuffed chicken breast with fresh brussels sprout salad

Hello there followers and other foodies out their 🙂

Before talking about this amazing chicken and salad I would like to say that I am sorry for my unstable blogging the last 8-9 month. As some of you may know my husband Chris and I relocated from Denmark to Atlanta, Georgia in early April to start a new life as entrepreneurs and it has taken a lot of our time and energy. Things rarely goes as planned and we have now turned to entrepreneurial adventure B which will leave me more time for cooking and blogging, which is what I really love spending my time on.
When plan B is ready to be know by the public, I will definitely drag all of you guys and girls into our adventure, so look forward to the next few month where a dream might come true.

Enough about me and my entrepreneurial dream, this blog is about food and today I will show you how to make the most amazing stuffed chicken breast with a fresh and crispy brussels sprout salad. If you think that either you, your better half, children or guests don’t like brussels sprouts, don’t worry… this salad tastes nothing like the steamed brussels sprouts that everybody remember from their childhood. I would even say, that if you serve it to people not telling them what it is, they will love it and ask for the recipe.
Today I serve the salad together with cheese stuffed chicken, but otherwise I like to add a little bit of feta cheese to the salad to give it an extra punch.
Besides this brussels sprouts recipe I can also recommend my honey glazed recipe as well as my other raw brussels sprout salad.

Hope that you will enjoy and please leave a comment if you have any questions or just want to learn more 🙂

Ingredients (4 servings)

Brussels sprout salad

16 oz. brussels sprouts, cleaned

1 bell pepper

1 red onion

3 tbsp olive oil

1 tbsp honey

1.5 tbsp grainy mustard

1 lime, juice

Stuffed chicken breast

4 chicken breasts, organic

6 oz. cream cheese

0.5 red onion

1 chili pepper

1-2 garlic cloves

1 pinch of black pepper

8 oz mushrooms

8 oz bacon, sliced

2 tbsp butter

Salt & pepper

Begin with the chicken breasts. Preheat the oven at 400F/200C and cover a baking tray baking paper followed by a wire rack. Make sure that there is space between the baking tray and the wire rack, this will help the bacon get crisp all the way around.

Chop onion, garlic and chili pepper (I used jalapeños, but if you like a more kick to your chicken choose something with more heat) finely and add it to a bowl with cream cheese and black pepper. Mix it all together and set aside while preparing the mushrooms and chicken breasts.
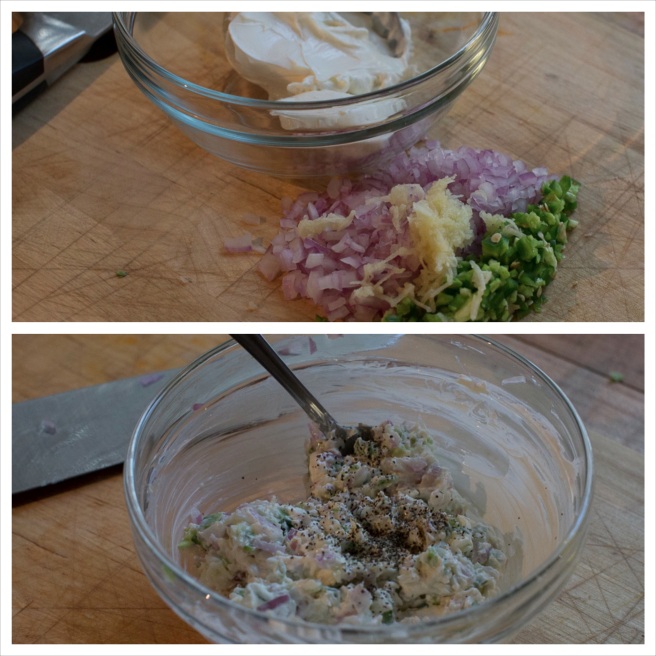
Stuffed chicken with brussels sprouts salad 2

Clean and slice the mushrooms. Remember never to clean mushrooms by washing them as it will remove a lot of the flavor, use a brush or a little sharp knife instead.
Add the sliced mushrooms to a dry medium-hot pan and sauté until most, but not all of liquid has evaporated. If you add too many mushrooms to the pan at one time, you will risk that instead of the liquid evaporating it will just be released into the pan and boil the mushrooms instead of sautéing them, so if you plan on making a larger portion do you self a favor and divide this process in two.
Transfer the sautéed mushrooms to a chopping board and let cool before chopping them into small pieces.
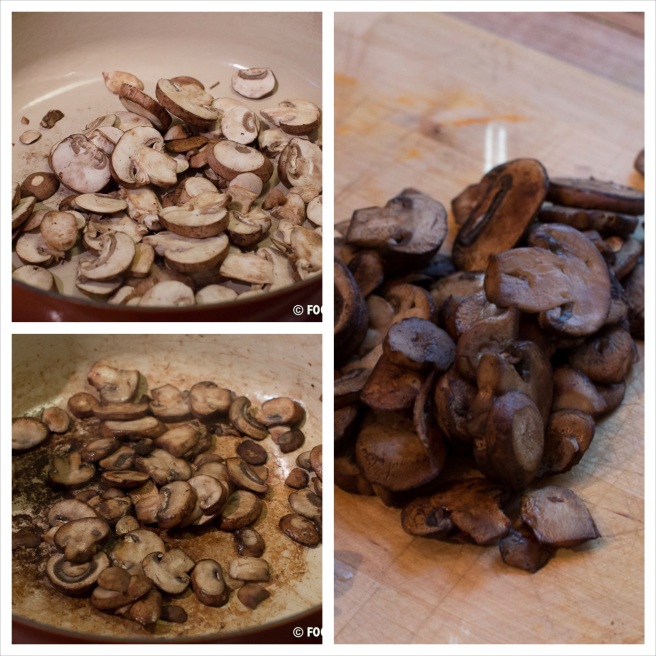
Stuffed chicken with brussels sprouts salad 3

Season the chicken breasts with salt and pepper. Without cleaning the pan add the butter and let melt at medium heat. Add the seasoned chicken breasts and roast on all sides until light brown, about 2-3 minutes on each side.
Remove the roasted chicken from the pan and make a deep slice into the side of the meat. Stuff the chicken with with your cheese filling and chopped mushrooms and wrap it in bacon.  On the picture below I have used an overload of bacon, but this not necessary. The most important thing is that the stuffing stays inside the chicken and not wether you have used 4 or 8 slices of bacon and how your wrap looks like. Of cause a nice looking wrap will make a better finished impression, but if the bacon gets layered it will be difficult getting it crisp.
Place the wrapped chicken breasts on the prepared baking tray/wire and bake in the oven until the internal temperature reaches 165F/74C which for me takes approximately 35-40 minutes.
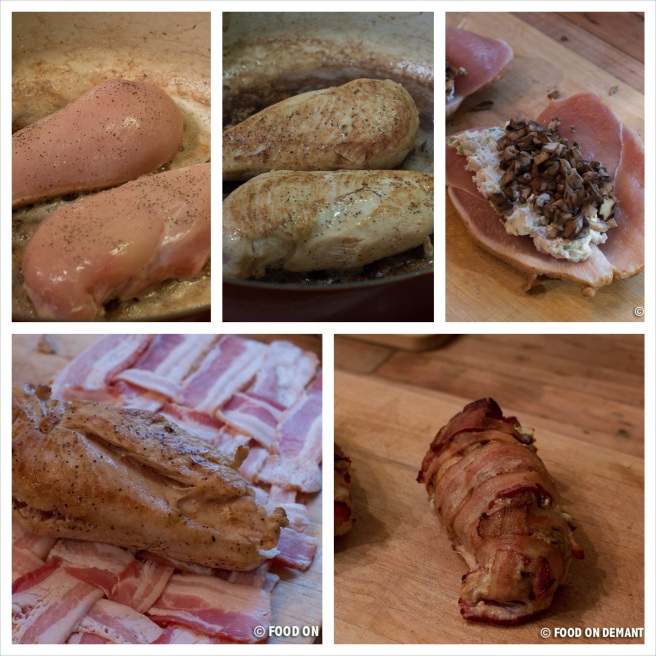
Stuffed chicken with brussels sprouts salad 4

While the chicken is baking you have time to prepare the salad.
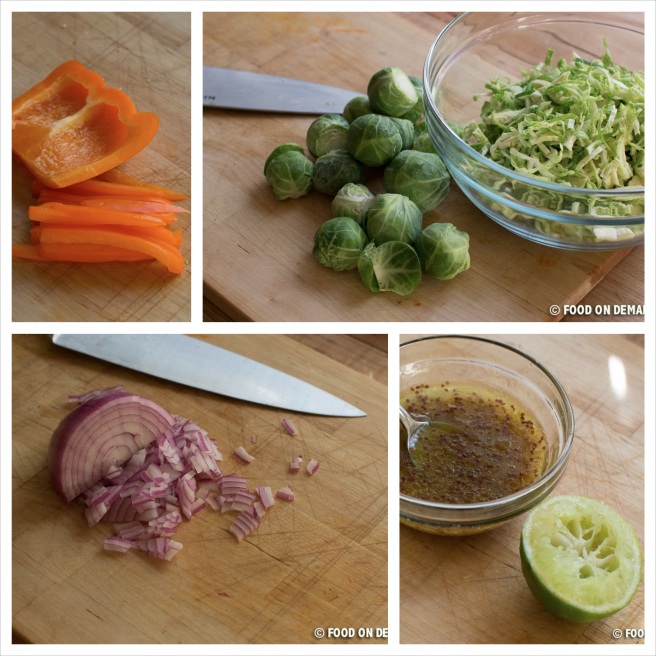
Cut the brussels sprouts in half and slice them. Clean and slice the pepper bell and red onion too. Add all three to a mixing bowl and use your fingers or two forks to combine it.
In another bowl, mix together olive oil, honey, mustard and lime juice. Mix well to make sure that the honey gets incorporated into the dressing and not left in the bottom of the bowl.
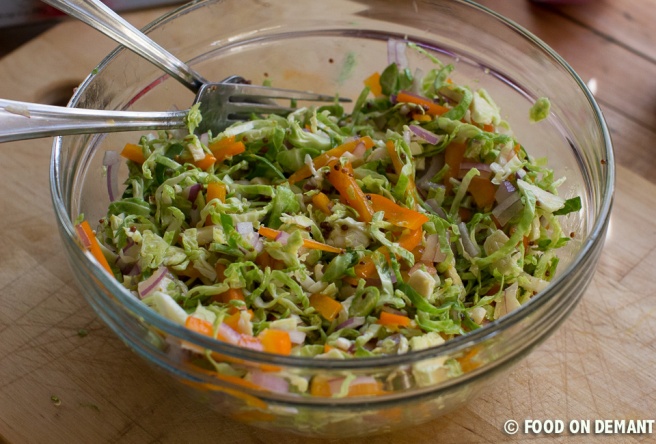
Pour the well mixed dressing over the salad and mix. Leave to rest until the chicken is finished. Stuffed chicken with brussels sprouts salad 1
The salad can also be made in advance if you are entertaining guests or your kids while cooking. Just have in mind that if you want the salad to be fresh and crispy, you will have wait and not add the dressing until last minute. If you on the other hand would like the dressing to get well mixed into the salad you can add it early and let in rest until dinner time. I like it either way so for me it depends on the time.
Stuffed chicken with brussels sprouts salad (8 of 23)

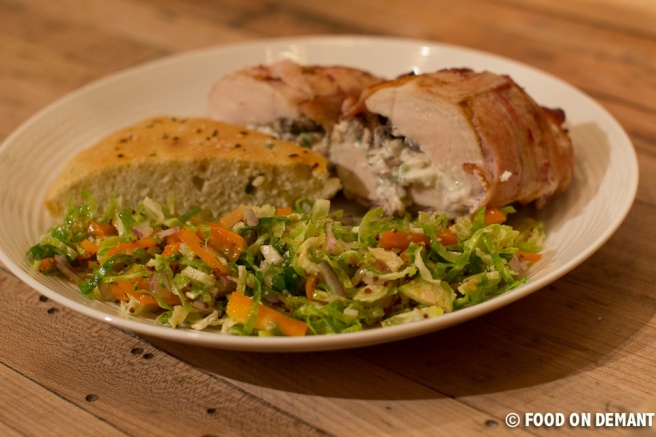
Remove the chicken from the oven when it has reached the wanted temperature and let it rest for a few minutes before slicing it. Arrange on a plate together with the salad and a piece of warm home baked foccacia bread.

Serve with a light beer or a cold glass of white- or rosé wine.
Stuffed chicken with brussels sprouts salad (22 of 23)

Bon Appétit friends!

Ingredients (4 servings)

Brussels sprout salad

450 g brussels sprounts, cleaned

1 bell pepper

1 red onion

3 tbsp olive oil

1 tbsp honey

1.5 tbsp grainy mustard

1 lime, juice

Stuffed chicken breast

4 chicken breasts, organic

125 g cream cheese

0.5 red onion

1 chili pepper

1-2 garlic cloves

1 pinch of black pepper

225 g mushrooms

225 g bacon, sliced

2 tbsp butter

Salt & pepper
Gateau Marcel

This delicious French Mousse Cake can save any working weekend 🙂

Food on Demant

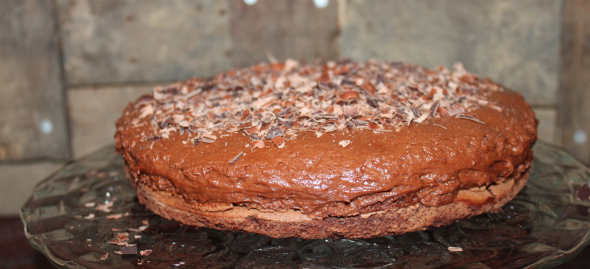
Last night we had my parents over for dinner and I wanted to make a delicious, creamy and chocolate heavy cake for dessert. Therefore I chose to make a Gateau Marcel inspired by my favorite Danish chocolate blog. Both my parents, my husband and those of my colleagues who were at the office today loved it.

I chose to fill it with fresh raspberries as the cake itself can be a bit heavy, and the combination of baked/unbaked chocolate mousse and raspberries was fabulous. Other fresh berries might work as well.

IMG_5374

Ingredients (for 10 servings)

7 oz. quality bittersweet chocolate (I use my favorite chocolate Amedei Toscano Black 70%)

7 oz. butter

1 cup granulated sugar

8 egg yolks

5 egg whites

Preheat oven to 350 degrees.

Melt chocolate and butter together slowly in a heat proof bowl over a pan of simmering water. Be careful not to get…

View original post 226 more words

What to do with all the spam comments??

Hey there fellow (food)bloggers,

I know for sure that I am not the first one with this problem so I will turn to some of you who have been blogging seriously for a longer time.
Several of my blog posts are being spammed heavily and I don’t know what to do about it 😦

I am very busy these days working and blogging used to be the time where I could relax and focus on something different than work, but recently all this spam has gotten to me and I am feeling very annoyed about it. I even considered deleting my blog the other day – just to clear out all that spam!!

Please help me – what do you do to prevent/ignore all that spam? An please, share my frustrations with your fellow blog friends if you think they might be of any help to me….

Thanks,

A spam drowning blogger

Oven Dried Tomatoes – perfect for cheese

Time is running and we have already been in lovely perfect Roswell, GA for 3 month today. Compared to the first month we cook a lot now – actually I think that we cook al lot more than anyone else in our neighborhood. I really don’t understand how some people can eat out  everyday, and sometimes more than one time each day. That is so different from our culture where people eat at home every day and only go out on special occasions.

Well, as i said we cook a lot more now than we did in the beginning of our new US life, but we still need  a lot kitchen supplied to be up to date with our old kitchen back in Denmark. Until we are back at track everything is a little slow – even the blogging. However, I do have some easy recipes that I will try and put up during the next couple of weeks.

This recipe for oven dried tomatoes is one of them and it is one of my absolutely favorites to serve with a good piece of Italian bread and some strong aged cheese 🙂

Ingredients (1 cup)

80 small tomatoes (grapes or cherry), sliced in half

1 tbsp. fresh thyme leaves

1 tbsp. fresh rosemary, slightly chopped

3 garlic cloves, minced

1 tsp. salt

1/2 tsp. pepper
1/4 cup Extra Virgin Olive Oil (+ extra to pour in the jar)

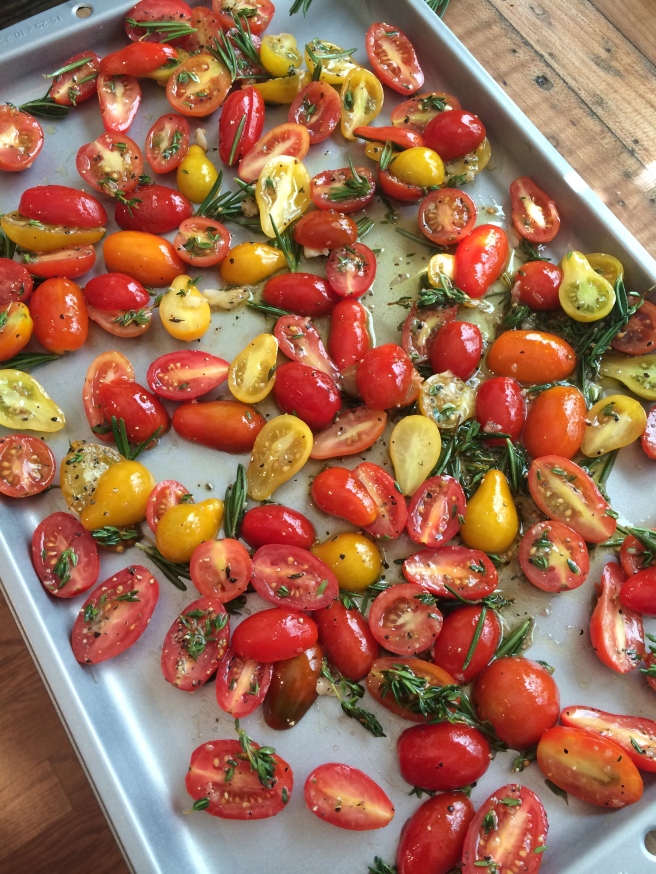
Mix all the ingredients in a bowl and pour onto a baking tray covered with baking paper. Make sure that the cutting surface of the tomatoes is turning up – otherwise they will bake differently.

IMG_1469
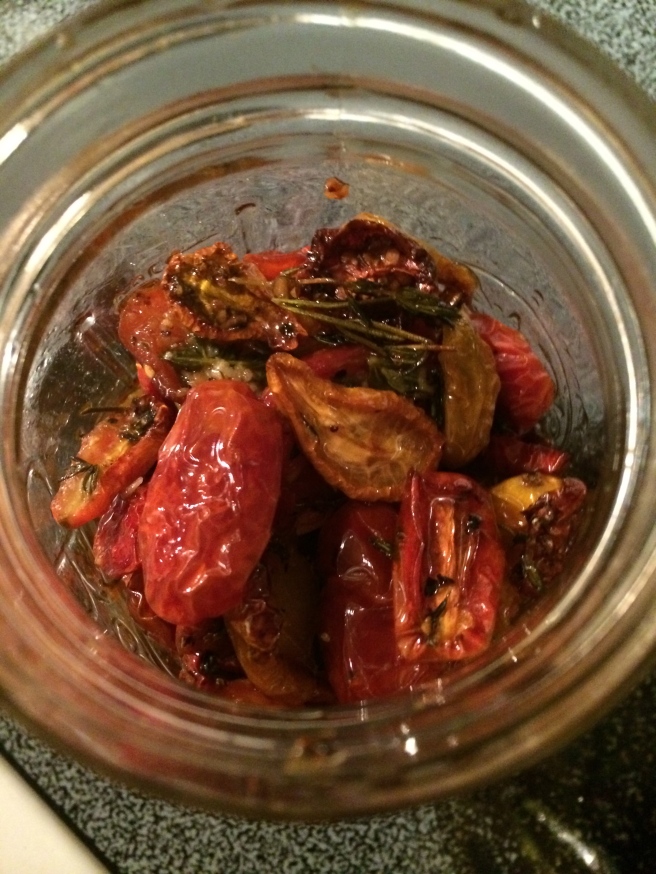
Place in a pre-heated 250F degree oven and let bake. Check after 2 hours to see if they have dried enough. If not, check again every 8-10 minutes until they have the wanted texture (I like mine to be a little soft , but every one is different 🙂 ).
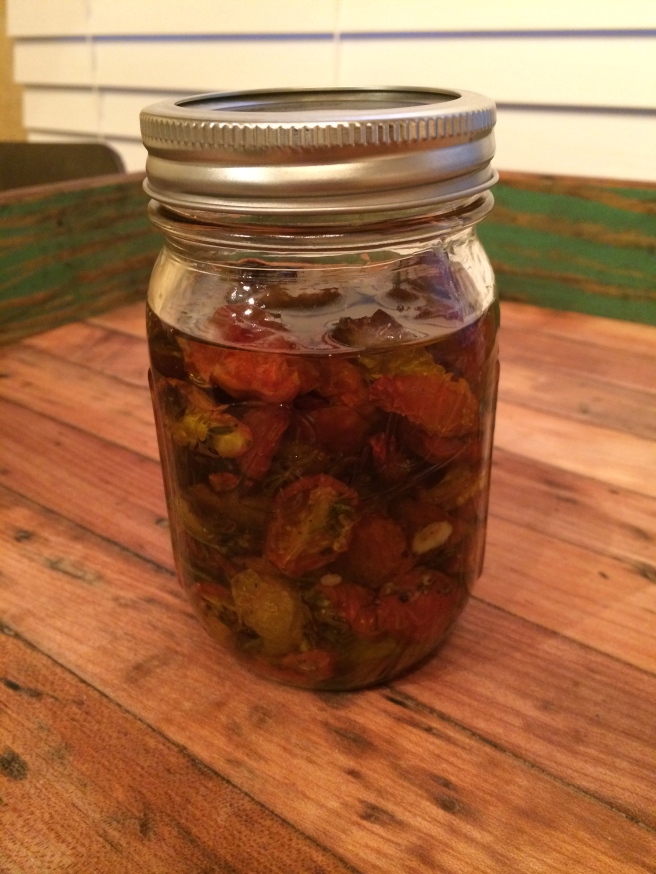
Pull out of the oven an leave to cool. Transfer to an air tight jar, e.g. Mason and pour Extra Virgin Olive Oil until all the dried tomatoes are covered. Refrigerate for up to two weeks.

IMG_1470 IMG_1471

Bon Appétit Friends!