Spicy Mayonnaise

Last week I gave you my version of an easy and creamy mayonnaise without any additives. This week I’ll show you how to spice up your mayonnaise in only a few minutes.
You can use any kind of chili for this recipe, but please do you self the favor only adding half the chili, then taste and then add more chili if necessary. You don’t want the chili to dominate the entire mayonnaise, but you still want it to have that spicy bite that makes it burn a little bit on the tongue.

Ingredients (1 cup)
1 cup mayonnaise
1 habanero chilies
1 garlic clove
1 tsp lemon zest
2 tbsp chives

Chop the chili, garlic clove and chives finely. Add half the chili and all the remaining ingredients to the mayonnaise and combine it thoroughly with a whisker or a spatula (I use the wicker on my KitchenAid stand mixer, as I make large portions, but a hand whisker or a spatula is just as good). Taste and add the remaining chili if you want it stronger. However, be aware that it takes a day or two to get to the full strength, so when you taste it at this point, you will not get the full power from the chili.

Spicy Mayonnaise 1

Transfer the mayonnaise to an air tight jar and refrigerate for up to 8 weeks. For the best result, keep refrigerated for 1-2 days before using it. If you don’t have 1-2 days to wait, you can of cause serve it immediately.
Fits perfectly as a condiment in sandwiches, for salty oven roasted potatoes, on top of a perfectly grilled lobster or as I like it best, on a peace of toasted French baguette with a slice of good salumi.Mayonnaise (12 of 12)

Bon Appétit Friends!

Ingredients (250 ml)

250 ml mayonnaise
1 habanero chilies
1 garlic clove, minced
1 tsp lemon zest
2 tbsp chives, chopped

Advertisement

Ginger and chili kick starter – without a juicer

Are you among those people that believe that you need a nice and expensive juicer to make your own juice? Well, I was once one of those people and as I knew I was moving from one end of the world to another I didn’t wanna go and spend the necessary amount of money on a juicer and was therefore not making any juices.
After a winter with a few colds, a sore throat and a bad craving for home made juice I decided to come up with an alternative. I went to my kitchen, looked in all my cabinets and quickly decided to try the blender, bowl, colander and kitchen towel method and you know what? It worked perfectly… and in that moment I realized that I had probably just saved about $200 (the average price for a good juicer in Denmark) – $200 that I could use on something else and still get a perfect juice whenever I wanted 🙂
Know that I have moved I still use this method as I find it a little stupid to spent money on something that I can do myself and get the same result. Of cause it takes a little longer (15 minutes) but I think it is worth it in the end and you will definitely fell more passionately about your juice when it is made this way 🙂

If you get hooked on the juice-without-a-juicer idea, you can check out my other my other juice recipes which includes carrot and clementine, clementine and orange, cranberry enegizer and the green vitamin bomb.

Ingredients (4 servings)

2 large or 4 medium apples

1 orange

0.5 lemon

1 chili

1 tbsp ginger root

0.5 cup water, cold

Rinse the apples in cold water, remove the core and chop into smaller pieces. Place in a regular blender together with the cold water. Blend for a few seconds to give space to remaining ingredients (this is not necessary if your blender is big enough to contain it all).
Peel the orange, lemon and ginger, cut it into smaller pieces and add it to the blended apples together with the chili. I have used a Tabasco chili, which gives it a little kick – not too much, not too little, but you can use any chili.
Blend it all well together. I use the ‘liquify’ button on my KitchenAid blender for about 30 seconds.

Ginger & chili juice 1

Find a bowl, a colander and a kitchen towel. It is important that it is a brand new kitchen towel that you only use for juicing and nothing else.
Place the colander in the bowl, cover it with the towel and pour approximately half of your juice batter into the towel.Ginger & chili juice 2

Use one hand to assemble the towel and the other hand to twist it around. Keep twisting to get all the juices out. Remove the all the dry fruit from the towel and repeat the process with the other half of the juice batter.
This portion makes about 3.5 cups (a lille less than 1 liter) and is enough for 4 servings.

Ginger & chili juice 3

Let the juice rest in the fridge for an hour or two if you want a strong ginger taste. Otherwise you can serve immediately in a glass with a few ice cubes.
If you have kids and plan on serving this juice for breakfast, you should consider leaving out the chili and only use half of the ginger.

Serve for breakfast, after a trip to the gym or use it as a natural remedy against a sore throat. This juice can be serves for anything at any time, so there is no excuse for not trying it 🙂

FOOD ON DEMANT (2 of 2)

Bon Appétit Friends!

Ingredients (4 servings)

2 large or 4 medium apples

1 orange

0.5 lemon

1 chili

1 tbsp ginger root

1.25 dl water, cold

Stuffed chicken breast with fresh brussels sprout salad

Hello there followers and other foodies out their 🙂

Before talking about this amazing chicken and salad I would like to say that I am sorry for my unstable blogging the last 8-9 month. As some of you may know my husband Chris and I relocated from Denmark to Atlanta, Georgia in early April to start a new life as entrepreneurs and it has taken a lot of our time and energy. Things rarely goes as planned and we have now turned to entrepreneurial adventure B which will leave me more time for cooking and blogging, which is what I really love spending my time on.
When plan B is ready to be know by the public, I will definitely drag all of you guys and girls into our adventure, so look forward to the next few month where a dream might come true.

Enough about me and my entrepreneurial dream, this blog is about food and today I will show you how to make the most amazing stuffed chicken breast with a fresh and crispy brussels sprout salad. If you think that either you, your better half, children or guests don’t like brussels sprouts, don’t worry… this salad tastes nothing like the steamed brussels sprouts that everybody remember from their childhood. I would even say, that if you serve it to people not telling them what it is, they will love it and ask for the recipe.
Today I serve the salad together with cheese stuffed chicken, but otherwise I like to add a little bit of feta cheese to the salad to give it an extra punch.
Besides this brussels sprouts recipe I can also recommend my honey glazed recipe as well as my other raw brussels sprout salad.

Hope that you will enjoy and please leave a comment if you have any questions or just want to learn more 🙂

Ingredients (4 servings)

Brussels sprout salad

16 oz. brussels sprouts, cleaned

1 bell pepper

1 red onion

3 tbsp olive oil

1 tbsp honey

1.5 tbsp grainy mustard

1 lime, juice

Stuffed chicken breast

4 chicken breasts, organic

6 oz. cream cheese

0.5 red onion

1 chili pepper

1-2 garlic cloves

1 pinch of black pepper

8 oz mushrooms

8 oz bacon, sliced

2 tbsp butter

Salt & pepper

Begin with the chicken breasts. Preheat the oven at 400F/200C and cover a baking tray baking paper followed by a wire rack. Make sure that there is space between the baking tray and the wire rack, this will help the bacon get crisp all the way around.

Chop onion, garlic and chili pepper (I used jalapeños, but if you like a more kick to your chicken choose something with more heat) finely and add it to a bowl with cream cheese and black pepper. Mix it all together and set aside while preparing the mushrooms and chicken breasts.

Stuffed chicken with brussels sprouts salad 2

Clean and slice the mushrooms. Remember never to clean mushrooms by washing them as it will remove a lot of the flavor, use a brush or a little sharp knife instead.
Add the sliced mushrooms to a dry medium-hot pan and sauté until most, but not all of liquid has evaporated. If you add too many mushrooms to the pan at one time, you will risk that instead of the liquid evaporating it will just be released into the pan and boil the mushrooms instead of sautéing them, so if you plan on making a larger portion do you self a favor and divide this process in two.
Transfer the sautéed mushrooms to a chopping board and let cool before chopping them into small pieces.

Stuffed chicken with brussels sprouts salad 3

Season the chicken breasts with salt and pepper. Without cleaning the pan add the butter and let melt at medium heat. Add the seasoned chicken breasts and roast on all sides until light brown, about 2-3 minutes on each side.
Remove the roasted chicken from the pan and make a deep slice into the side of the meat. Stuff the chicken with with your cheese filling and chopped mushrooms and wrap it in bacon.  On the picture below I have used an overload of bacon, but this not necessary. The most important thing is that the stuffing stays inside the chicken and not wether you have used 4 or 8 slices of bacon and how your wrap looks like. Of cause a nice looking wrap will make a better finished impression, but if the bacon gets layered it will be difficult getting it crisp.
Place the wrapped chicken breasts on the prepared baking tray/wire and bake in the oven until the internal temperature reaches 165F/74C which for me takes approximately 35-40 minutes.

Stuffed chicken with brussels sprouts salad 4

While the chicken is baking you have time to prepare the salad.
Cut the brussels sprouts in half and slice them. Clean and slice the pepper bell and red onion too. Add all three to a mixing bowl and use your fingers or two forks to combine it.
In another bowl, mix together olive oil, honey, mustard and lime juice. Mix well to make sure that the honey gets incorporated into the dressing and not left in the bottom of the bowl.
Pour the well mixed dressing over the salad and mix. Leave to rest until the chicken is finished. Stuffed chicken with brussels sprouts salad 1

The salad can also be made in advance if you are entertaining guests or your kids while cooking. Just have in mind that if you want the salad to be fresh and crispy, you will have wait and not add the dressing until last minute. If you on the other hand would like the dressing to get well mixed into the salad you can add it early and let in rest until dinner time. I like it either way so for me it depends on the time.

Stuffed chicken with brussels sprouts salad (8 of 23)

Remove the chicken from the oven when it has reached the wanted temperature and let it rest for a few minutes before slicing it. Arrange on a plate together with the salad and a piece of warm home baked foccacia bread.

Serve with a light beer or a cold glass of white- or rosé wine.

Stuffed chicken with brussels sprouts salad (22 of 23)

Bon Appétit friends!

Ingredients (4 servings)

Brussels sprout salad

450 g brussels sprounts, cleaned

1 bell pepper

1 red onion

3 tbsp olive oil

1 tbsp honey

1.5 tbsp grainy mustard

1 lime, juice

Stuffed chicken breast

4 chicken breasts, organic

125 g cream cheese

0.5 red onion

1 chili pepper

1-2 garlic cloves

1 pinch of black pepper

225 g mushrooms

225 g bacon, sliced

2 tbsp butter

Salt & pepper

White Chocolate, Chili and Liquorice Truffles

Truffles is one of my favorite christmas treats and I make them in several different variations each year.

This version is with home grown dried chilies from my parents garden and the chocolate is of cause Amedei Toscano White which is my favorite chocolate brand and never use anything else. It is bit more expensive than other chocolate brands but I promise that it all worth it!! Having guest over, they alway get an extra big smile on their lips when I bring a small bowl of these delicious and creamy chocolate chip to the table. If you ever get the change to taste it, I will highly recommend that you use the extra few $ and buy this brand instead of your usual choice.


Ingredients (40 truffles)

10 oz. white chocolate chips (I prefer Amedei)

4 oz. heavy cream

1 large orange, zest

1-2 tsp. dried chili flakes

2 tbsp. liquorice powder


Melt the chocolate in a heat prof bowl over a pan of simmering water. Remove form heat when chocolate is melted.

Add orange zest and cream to a frying pan and bring to a boil. Pour 1/3 of the hot cream into the melted chocolate and stir to combine. Add the remaining cream and chili flakes and stir until evenly combined.

Leave the truffle mixture to cool in the fridge for at least 4-5 hours or preferably over night.

Use a teaspoon to make 30 small pieces (1/2 oz. each) and use your hands to roll it into balls. Fridge again.

Place the liquorice powder in a small bowl and remove the truffles from the fridge just before serving. Toss gently in liquorice powder and serve 🙂

Chili and Liquorice Truffles 1_Fotor_Collage

Chili and Liquorice Truffles 5

Bon Appétit!


Ingredients (30 truffles)

280 g white chocolate chips (I prefer Amedei)

113 g heavy cream

1 large orange, zest

1-2 tsp. dried chili flakes

2 tbsp. liquorice powder

Our Growing Edge: Chili and Liquorice Caramel Truffles

Last month we were invited to participate in Our Growing Edge which is a monthly blogging event where bloggers from all over the world add recipes or ideas that new to them. The event is hosted by Leah from Melbourne who has the blog Sharing the Food We Love – take a look at her site and be inspired 🙂

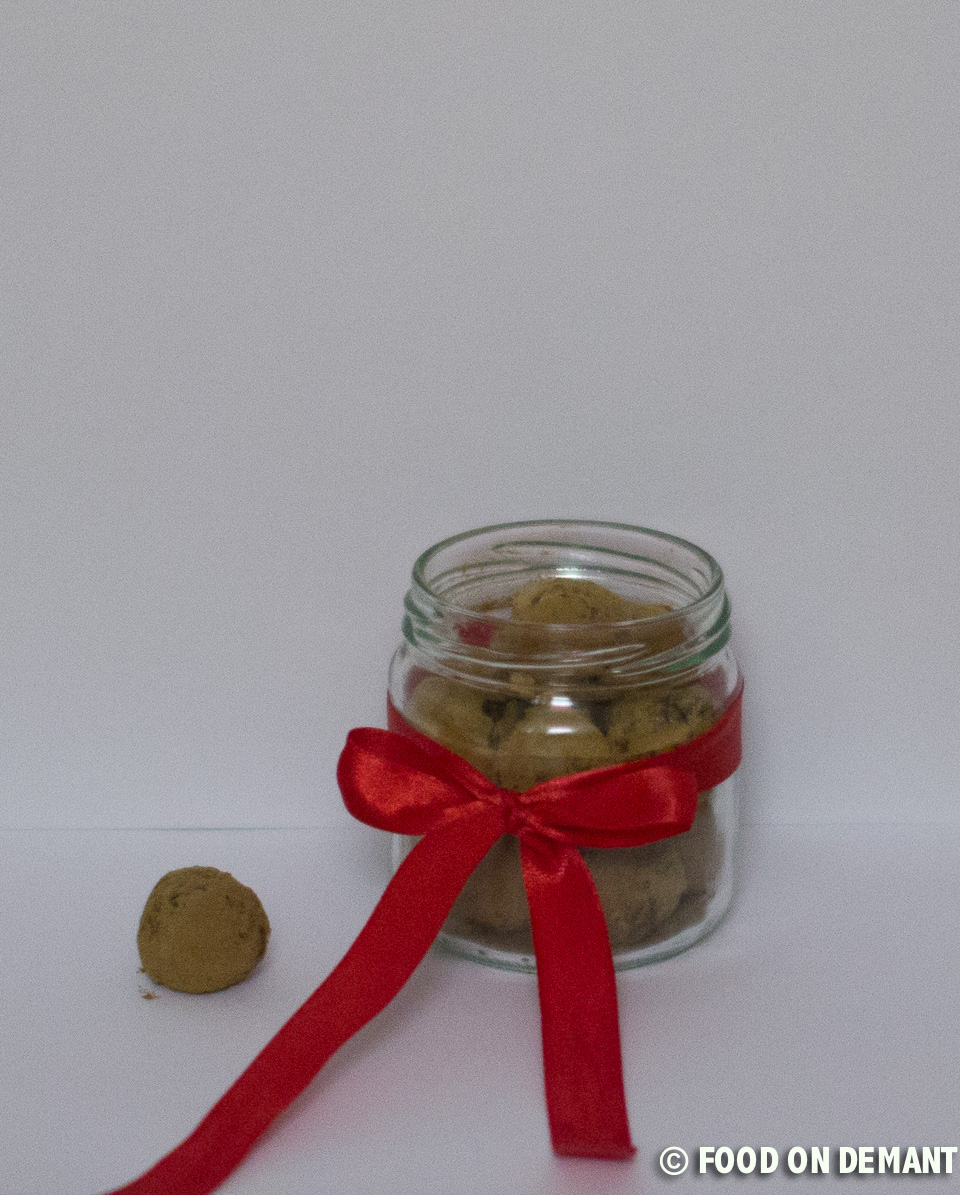
This month we have decided to participate with these delicious truffles as it is out first attempt to make, but definitely not the last 🙂

our-growing-edge-badge

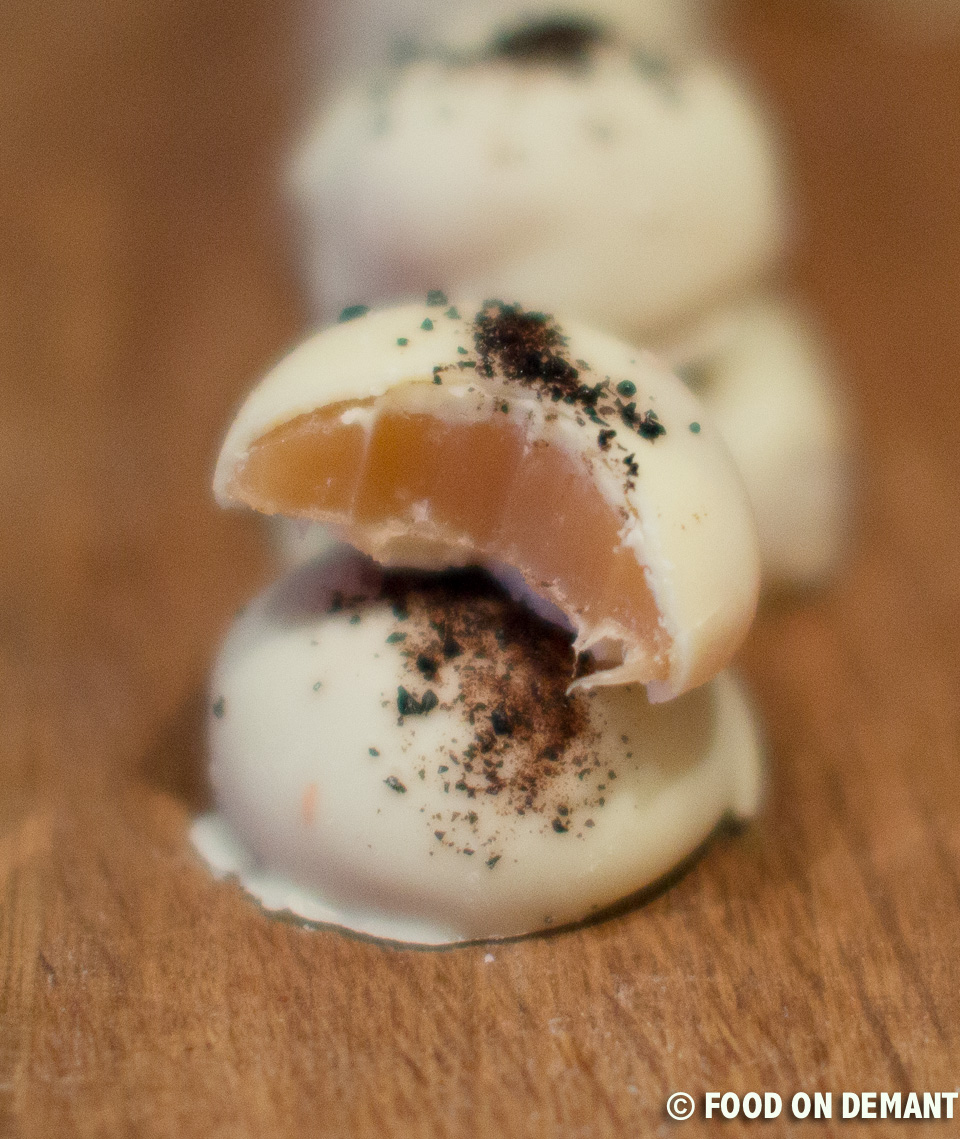
Yesterday we blogged about the most amazing sea salt caramel truffles that we have ever tasted – and made. The combination of the sweet and soft caramel, the sea salt and the powerful Amedei chocolate 🙂

During the process with the sea salt caramels, I came to think of our passion for chili (actually I prepared dinner, touched a chili and rubbed my eye) and decided that I would try a more spicy version with chili and liquorice and they turned out to be the most wonderful combination of flavors that we wish for everyone to try 🙂

The basics is the same as for the sea salt caramels, so it is only the sprinkling and chocolate that differs. If you want to make these delicious petit fours, I’ll recommend that you choose a good quality chocolate like Valrhona or Amedei as we used here, but a cheaper but still good brand is also okay.

Hope that you and your family will enjoy the caramel truffles just as much as we have done 🙂

Chili:liquorice Caramel 12Ingredients (70 caramels)

1 cup sugar

1 cup light corn syrup

1 stick butter

1 cup heavy cream

2 tbsp. chili flakes, for sprinkling

3 tbsp. raw liquorice powder

10 oz. white quality chocolate (70%), I prefer Amedei Toscano White

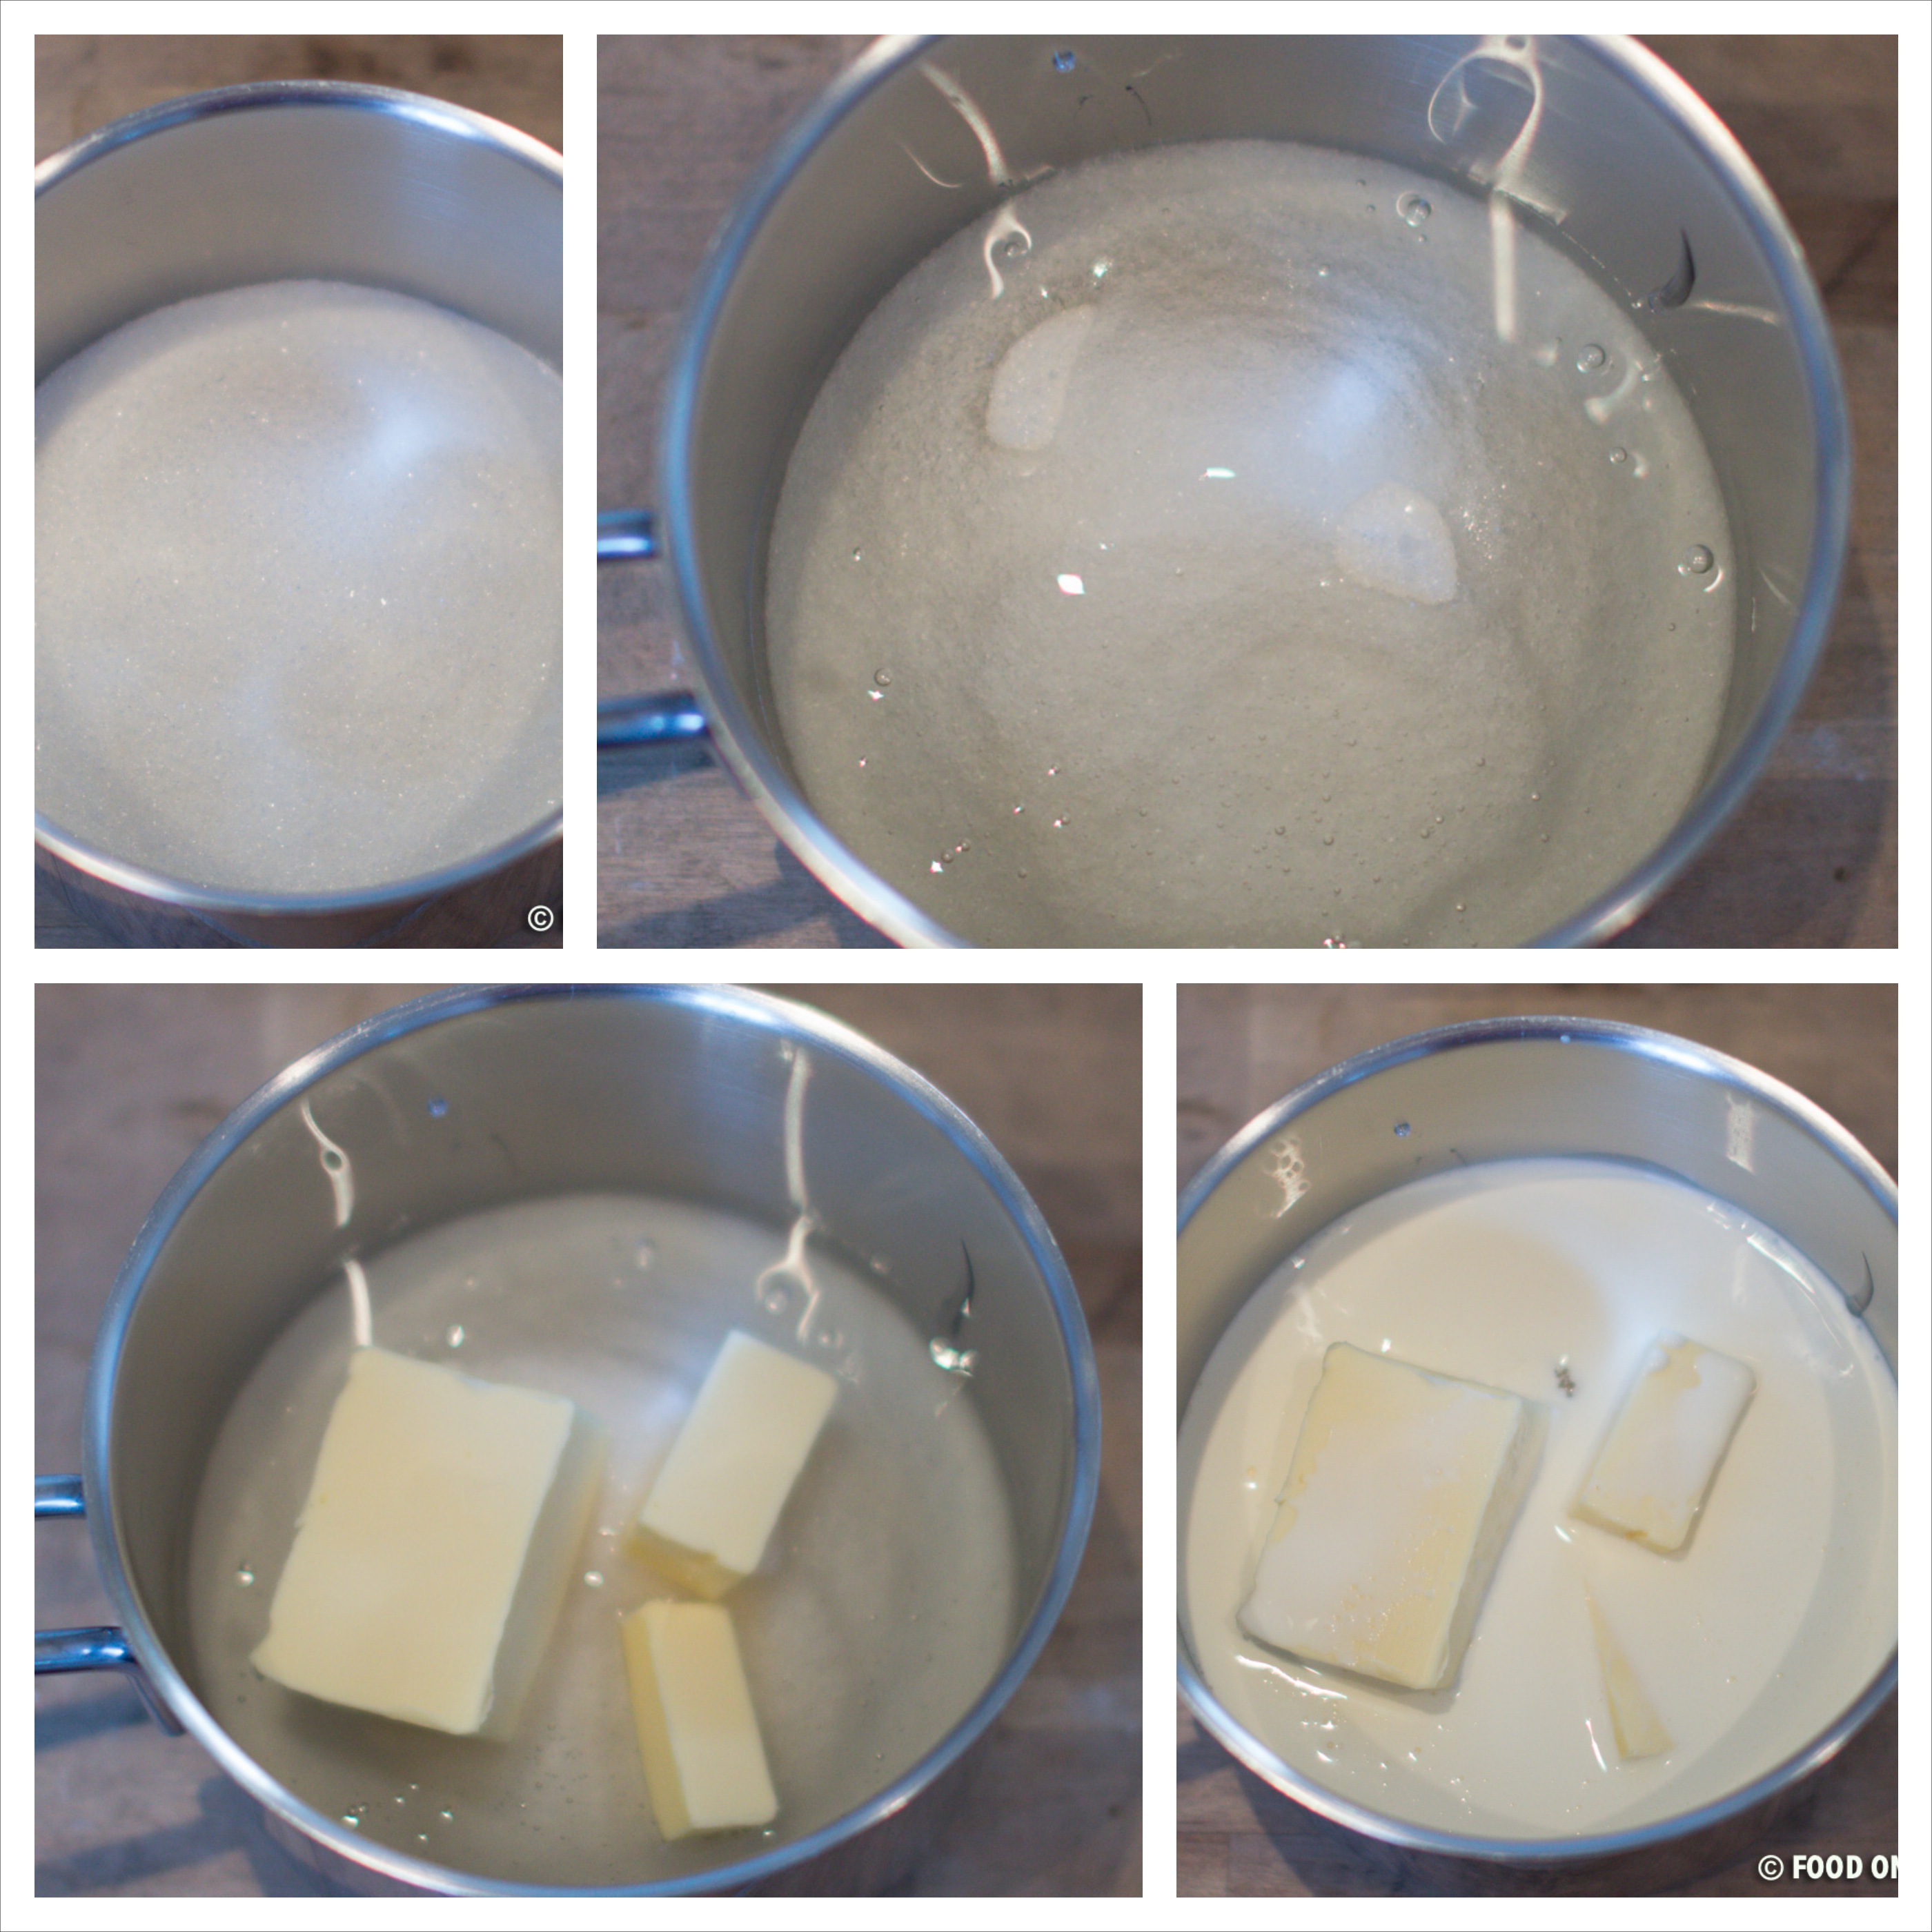
In a heavy saucepan over medium-low heat, combine the sugar, corn syrup, butter and 1/2 cup of the cream. Bring to a simmer, stirring constantly, and then cook, stirring, until a candy thermometer registers 240°F, about 10-15 minutes. Remove from the heat and drizzle in the remaining 1/2 cup cream, stirring to mix well. The mixture will bubble up slightly.

Sea Salt Caramels 1_Fotor_Collage

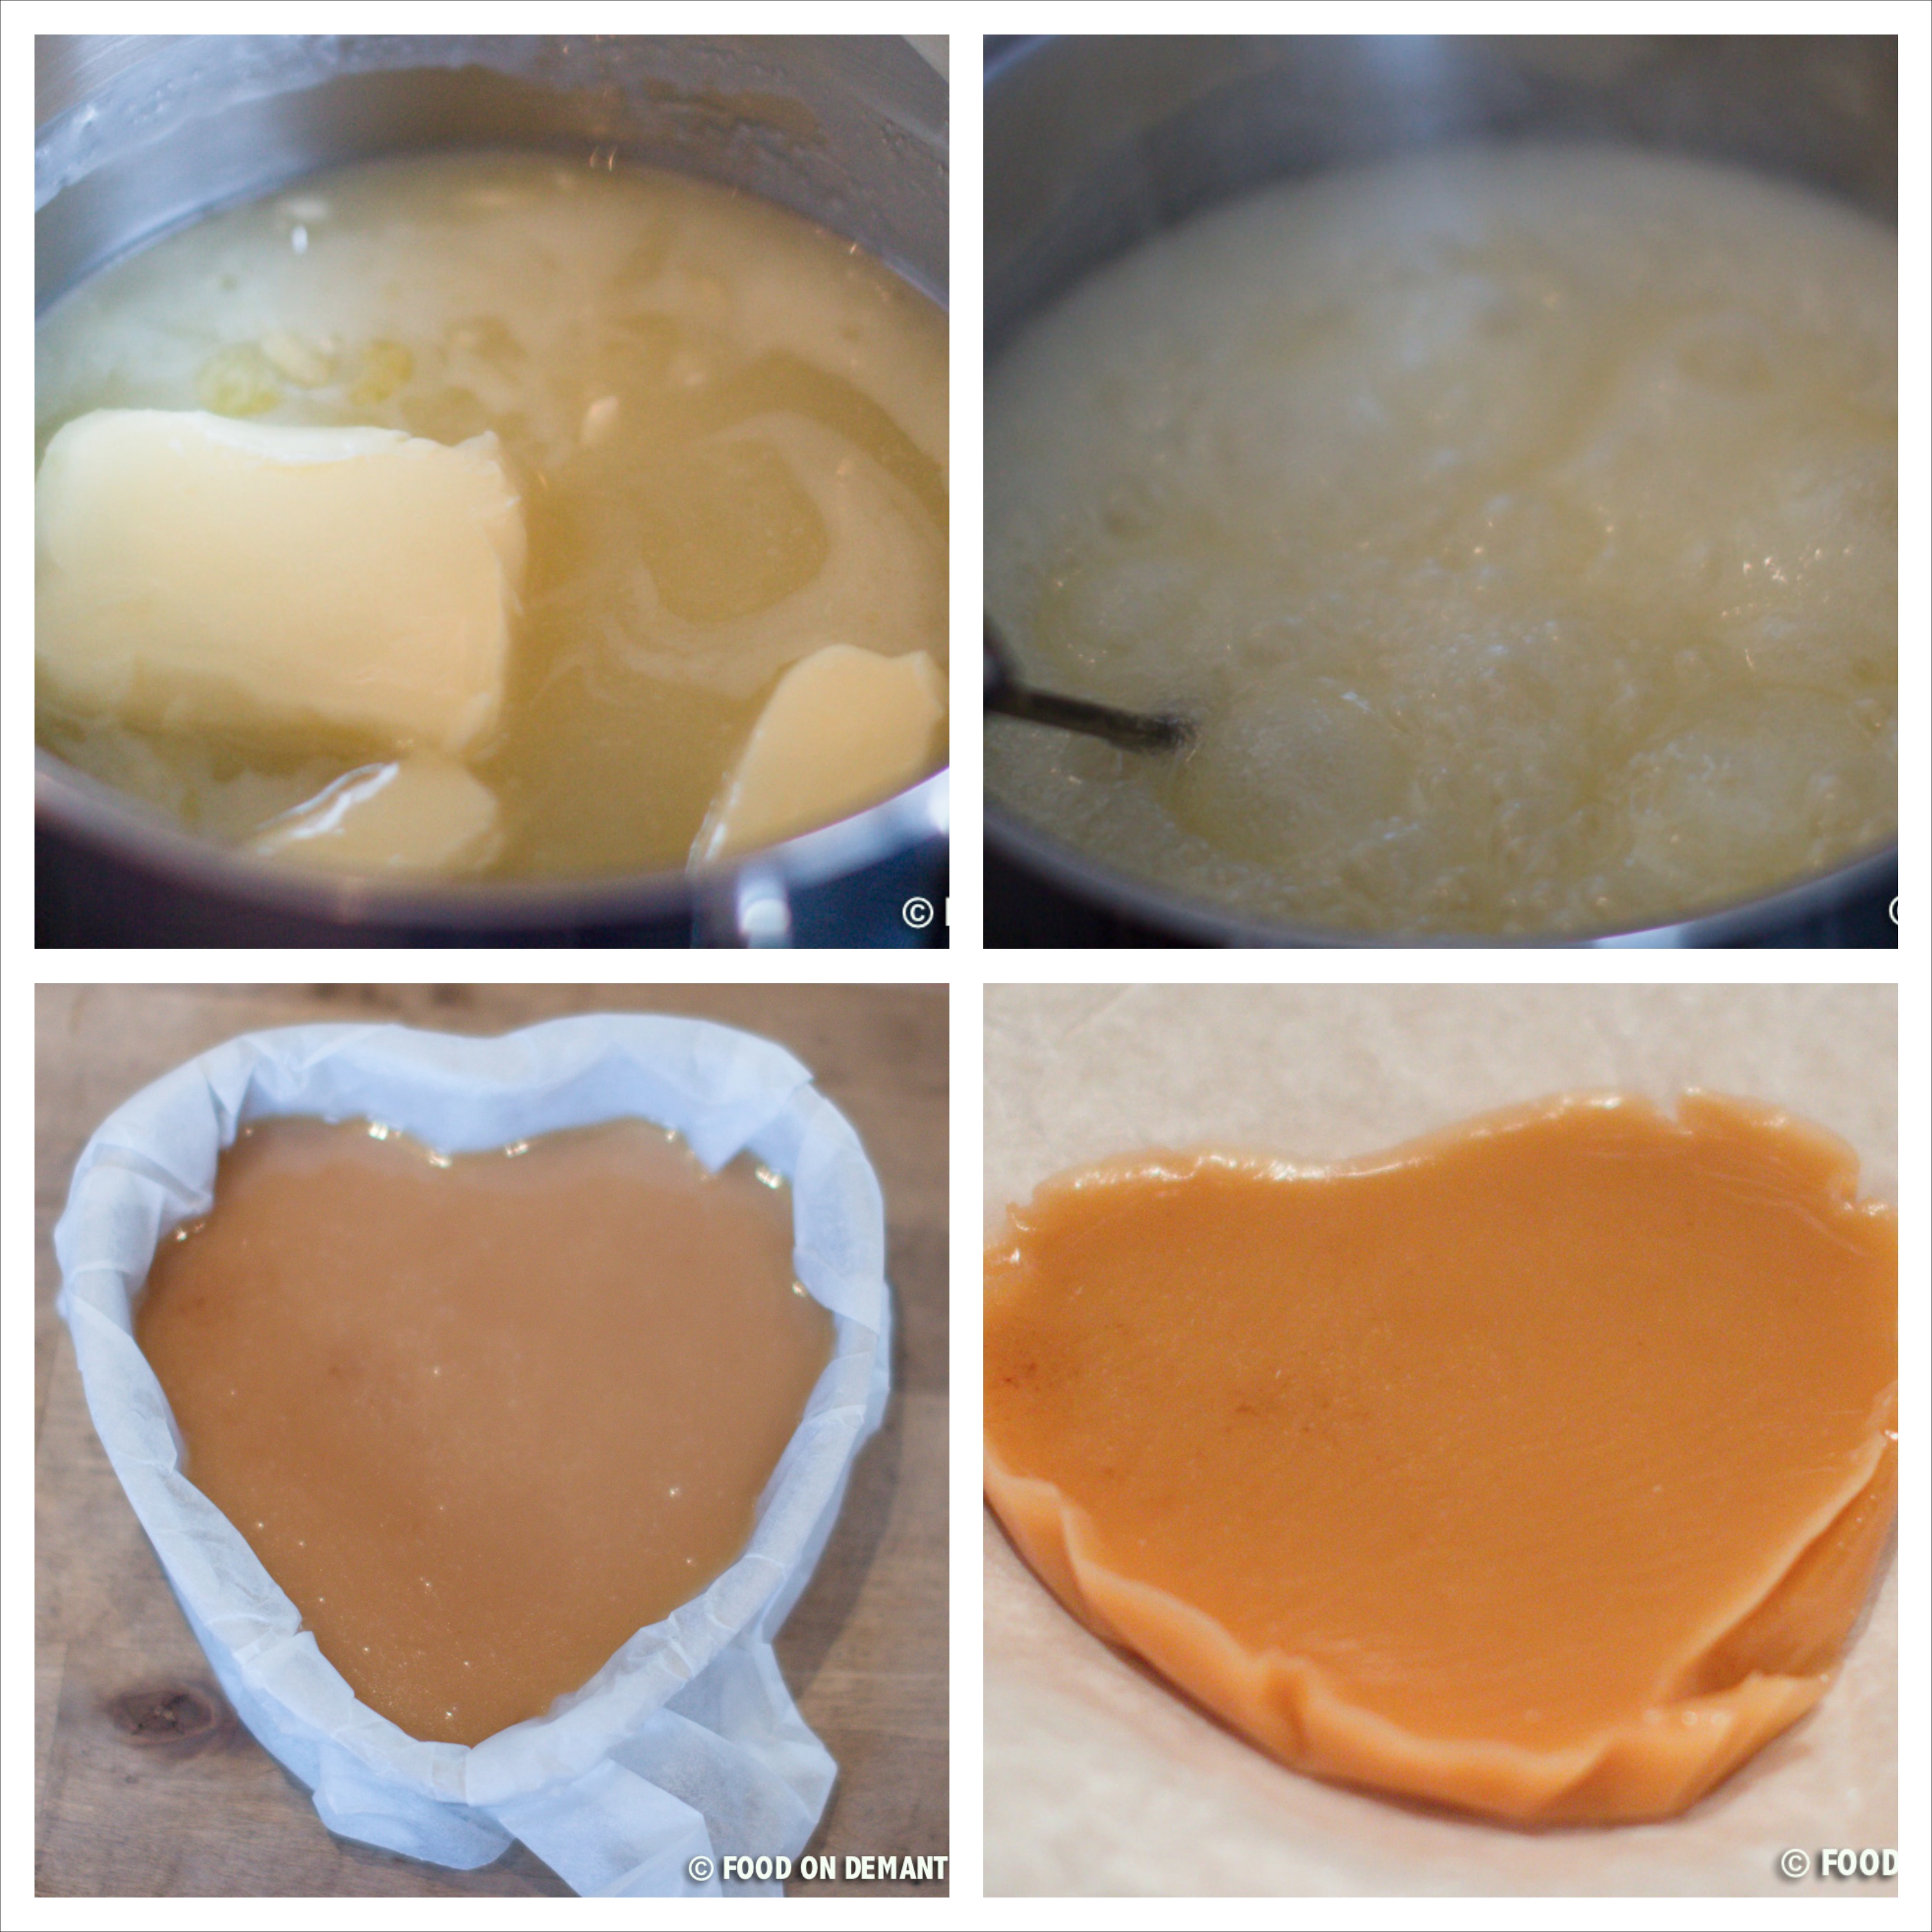
Return the pan to the heat and continue to cook until the thermometer registers 244°F, about 10 minutes more. Remove from the heat and pour the mixture into a prepared pan.

Sea Salt Caramels 2_Fotor_Collage

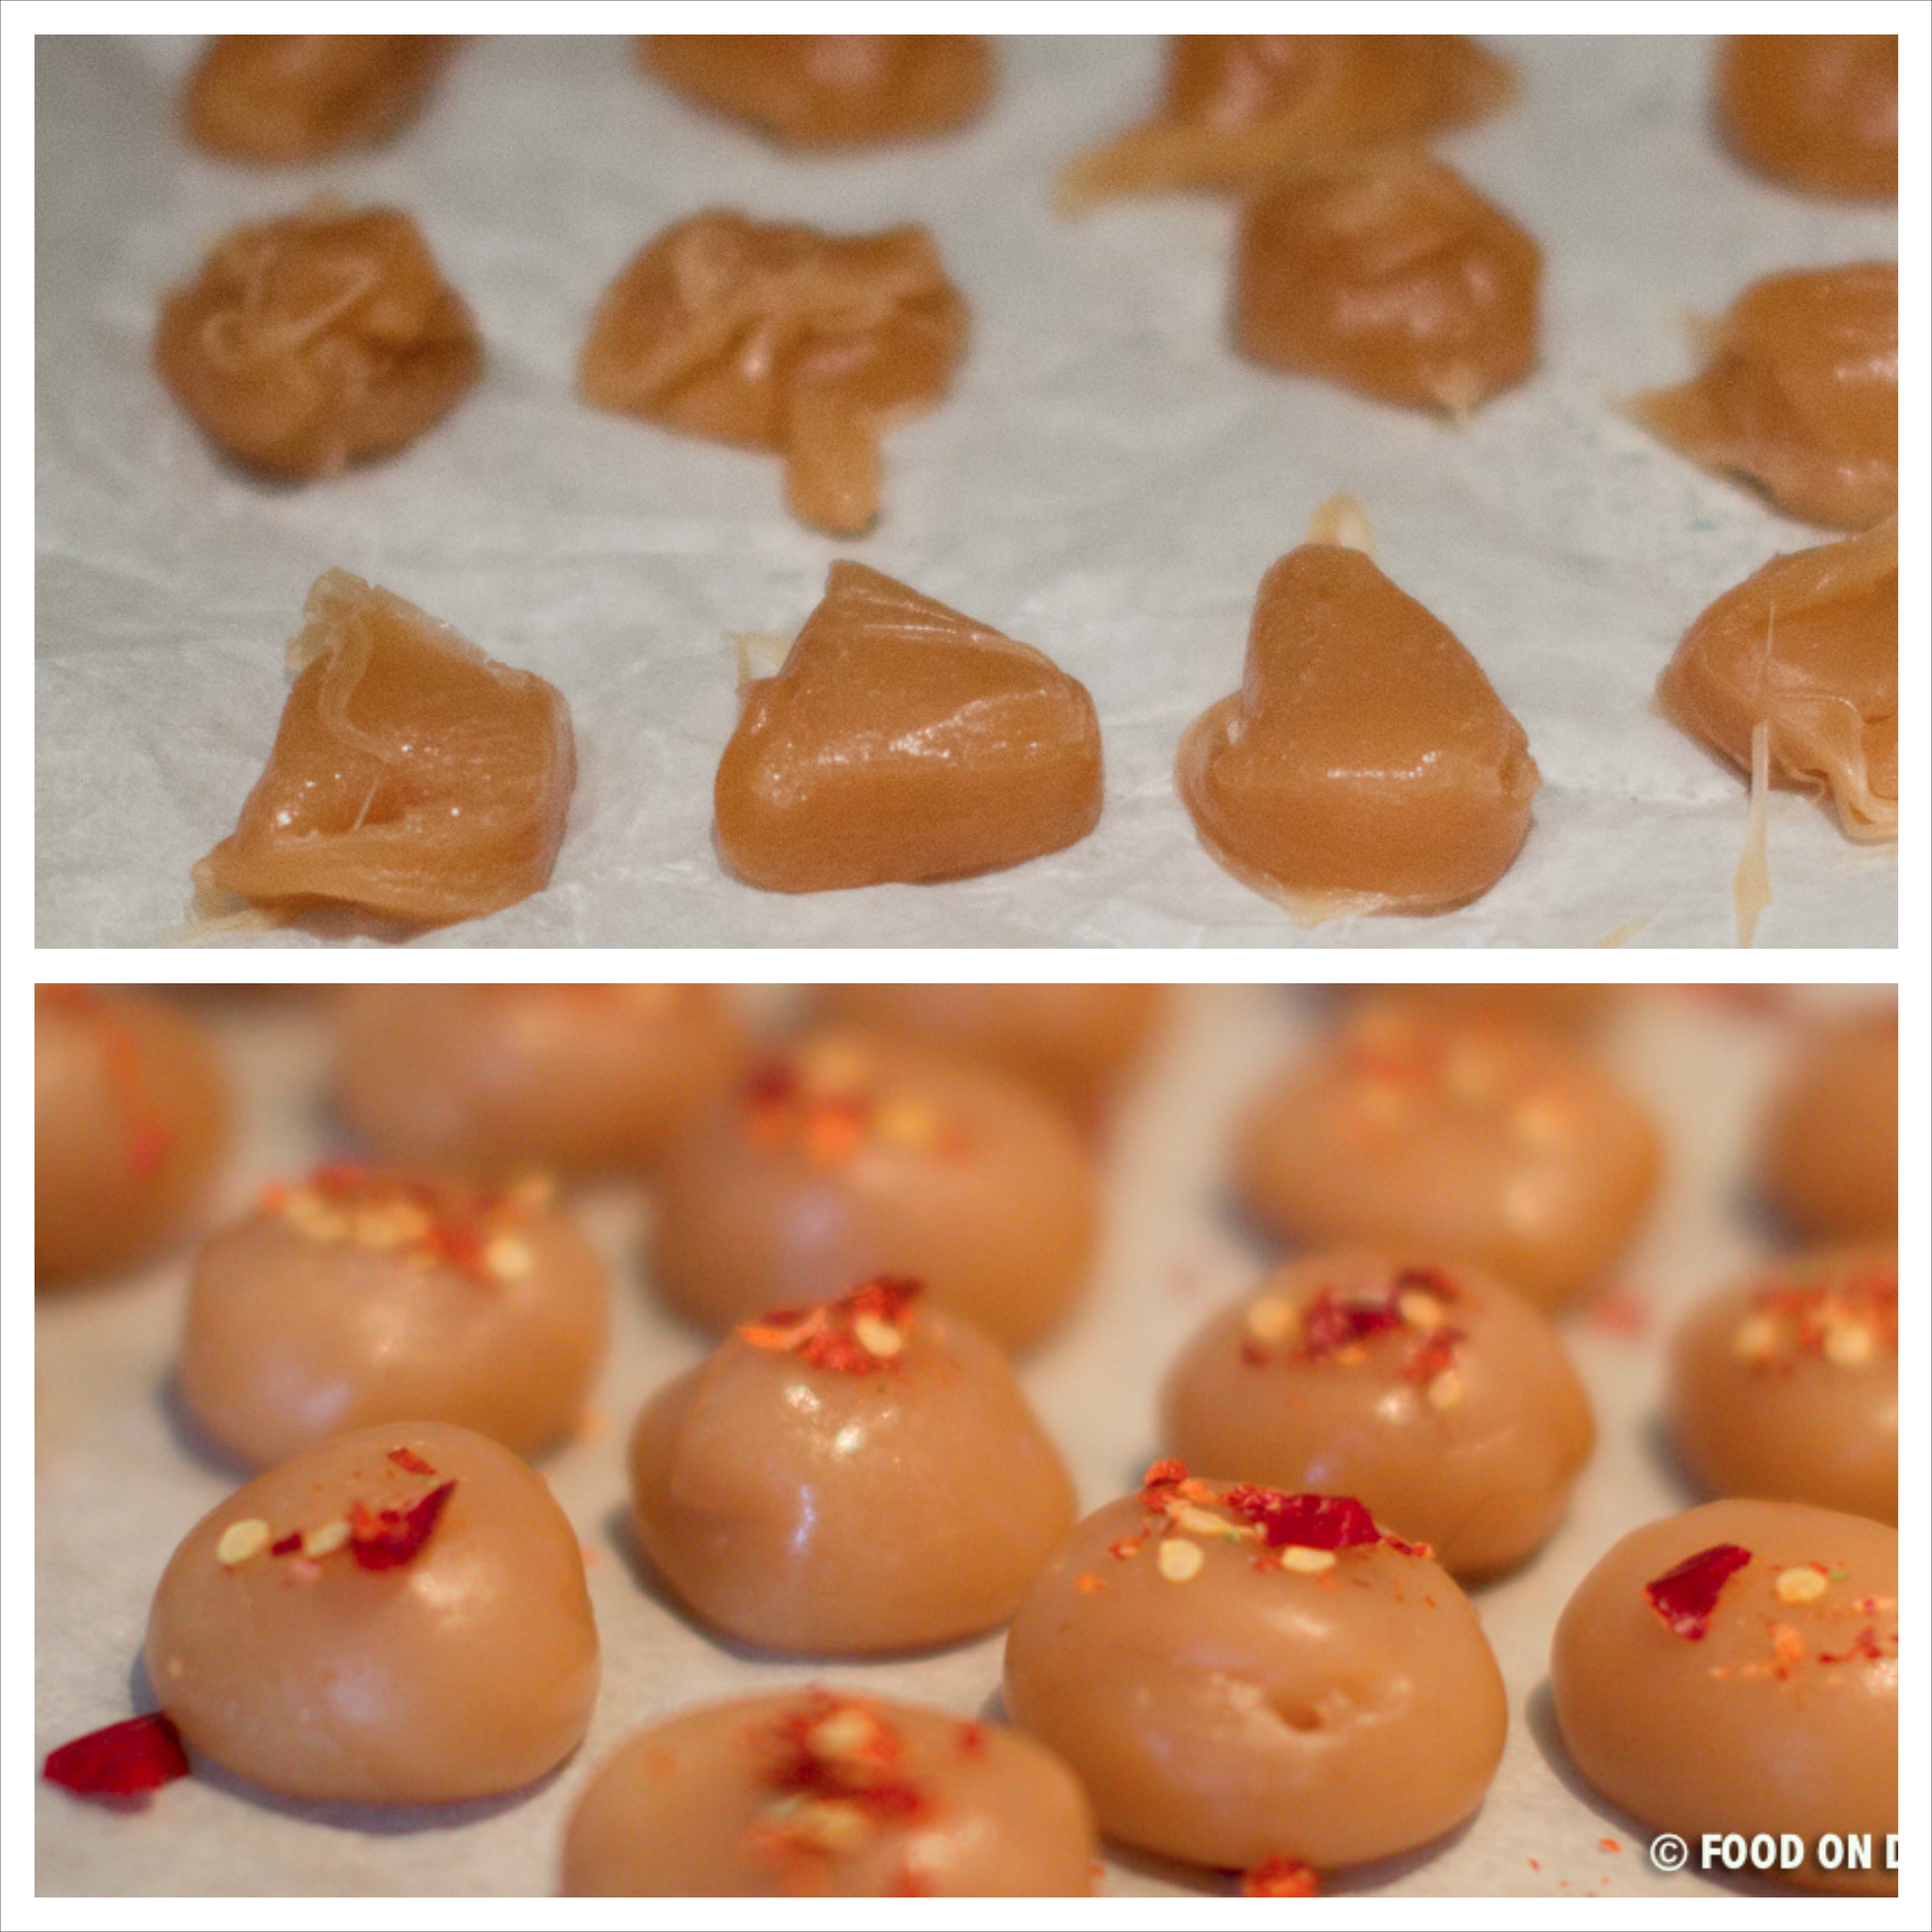
Let stand for 1 1/2 to 2 hours. The mixture should be firm to the touch but not hard. Using a teaspoon, scoop out and form balls of caramel and place them on a sheet of baking paper. If you want the caramels to be exactly the same size, you can weight the caramels – to get 70 caramels, they should weight 0.35 oz each. The caramel scraps can be gathered and shaped into balls by hand. Sprinkle each ball with a few grains of sea salt. Let stand for 1 hour before dipping.

Chili liquorice Caramel 1_Fotor_Collage

Chop the chocolate roughly and melt 2/3 in a heat proof bowl over a pan of simmering water. Pour the melted chocolate over the remaining chocolate and wait for 30 seconds before you begin to stir.
Line 2 baking sheets with baking paper.

Chili liquorice Caramel 2_Fotor_Collage

Dip the caramel balls one at a time into the chocolate, turning to coat. Transfer to the baking paper to cool. Add a sprinkle of raw liquorice powder to the top of each truffle and let stand until the chocolate is firm and set.
Store in layers, separated by waxed paper, in an airtight container at room temperature for up to 1 week.

Chili:liquorice Caramel 13

Bon Appétit!

Ingredients (70 caramels)

2.5 dl sugar

2.5 dl light corn syrup

113 g butter

2.5 dl heavy cream

2 tbsp. chili flakes, for sprinkling

3 tbsp. raw liquorice powder

285 g white quality chocolate (70%), I prefer Amedei Toscano White

Spicy Elderflower Cordial and Syrup

I few days ago I was out walk with my mom and a friend of mine. We went to walk my friends moms dog, but we ended up going on an elderflower hunt instead 😀

We went to an area where there in our childhood was a playground, but unfortunately (for the kids living there now) the area is now overgrown with  nettles, ground elder, brambles and elderflowers. There had been some elderflower pickers before us, so we had to go home to get a garden cultivator so that we could get the top flowers. In a short while we had picked more than 50 elderflower heads and were ready to walk the now very impatient dog 😀

The elderflower season in Denmark is normally in May/June, but due to the cold weather we have had this spring, you might still be lucky to find some during the next few weeks 🙂


Ingredients

30 – 40 elderflower heads

3 organic lemons, sliced

4 inches ginger root, peeled and sliced

2 red chilies, sliced

4 cups cane sugar

2 tbsp. citric acid

6 cups water

IMG_0129

Heat the water until it begins to boil. Carefully remove all the small insects and other not-elderflower-objects from the elderflowers heads, but DON’T rinse! Rinsing them will remove the pollen from the flowers, and the end-result will be less tasteful!

Place all ingredients, except water, in a heat proof bowl and cover it with the boiling water. Stir to combine and dissolve the sugar.

IMG_0135

Cover the bowl with a lid or plastic wrap and fridge for 3-4 days, stirring occasionally (at least once a day).

Filter the juice through some tightly woven fabric and into cleaned bottles or ice cube bags if you want some for the freezer. If bottled, keep cool for up to 4 weeks.

This portion makes 6 cups of elderflower cordial, but I have chosen only to bottle 4 cups, and make syrup from the remaining 2 cups.

Use for lemonade (1 cup elderflower cordial to 4 cups cold water, 10 ice cubes and 1 sliced organic lemon) or do as me – make elderflower cupcakes  (recipe will follow) 🙂

IMG_0335

Elderflower Syrup (1 cup)

2 cups elderflower cordial


Heat up the elderflower cordial at low-medium heat in a saucepan. Stir occasionally and let cook until reduced properly. It is up to you, what you think is ‘properly’, but i have reduced it down to 1 cup. You can easily reduce i more, but be careful that it doesn’t burn.

Use for Elderflower Latte, as a syrup for aged cheese, as a cocktail syrup or as an ingredient to you summer cupcakes.

IMG_0342

Bon Appétit!

Ingredients (elderflower cordial)

30 – 40 elderflower heads

3 organic lemons, sliced

10 cm ginger root, peeled and sliced

2 red chilies, sliced

10 dl cane sugar

2 tbsp. citric acid

1.5 liter water


Elderflower Syrup (1 cup)

5 dl elderflower cordial


911 Hot Sauce

Are you a fan of VERY hot hot sauce? Then try this incredibly hot chili sauce which is on the edge of being uneatable in large amounts, but still full of flavors and a great dipping sauce for chicken or as seasoning for meatballs and chili.

We made it for burritos, but have since used it for everything that needs to be spiced a little 🙂


Ingredients (6 cups)

5-6 large tomatoes

1 red onion, chopped roughly

1 cup chilis

4 cups water

1/8 cup steak pepper

1/8 garlic powder

1/8 cup salt

1 can chipotle in adobo sauce

2/3 cup ketchup


Bring together tomatoes, onion, chilies and water and bring to a boil. Let cook for about one hour with the lid on.

Take the saucepan of the heat and let rest with the lid on for 30-45 minutes. Add the remaining ingredients, stir around and blend it. Blend until evenly combined.

Keep stored in an clean airtight jar.

IMG_6000

Bon Appétit!

Ingredients (6 cups)

5-6 large tomatoes

1 red onion, chopped roughly

2.5 dl chilis (20-40 chilis depending on the size)

1 liter water

0.3 dl steak pepper

0.3 dl garlic powder

0.3 dl salt

1 can chipotle in adobo sauce

1.6 dl ketchup